Tuesday, August 30, 2011

The Indie Bloom Collection


We have recently received in a new 12x12 collection of paper from Basic Grey called Indie Bloom. This collection is bright and colorful and full of great patterns. The collection also has some great embellishments that coordinate so well with the papers.

I decided to make a few different gate cards with this collection, and am so excited on how they turned out. I used 3 different papers:


Senora - Tortilla

and Tres Chic.


I also used the canvas boarders and the layered stickers and for these cards. The canvas boarders are my favorite embellishment from this line, and I am going to have to buy some more paper so I can use more of them!!!


Here are the instructions to make a simple Gate-Fold Card.


Ingredients

1 - 11 x 4.25 piece of cardstock for your card base
1 - 3.25 x 4 inch piece of coordinating patterned paper
1 – 2 x 4 inch piece of coordinating patterned paper
1 - 1.5 x 3.5 piece of cardstock for a closure
1 – 1 x 3 piece of cardstock for stamping a message
1 magnetic disc – I used the Basic Grey Magnetic Discs.
Embellishments
Scoring tool

Step one

Score your 11. x 4.25 piece of cardstock at 3.5 inches and 9 inches. Crease the score lines.

Step 2

After choosing the pattern design you like best, adhere the 3.25 x 4 inch piece of patterned paper on the larger fold and the 2 x 4 inch piece on the smaller fold.

Step 3

Stamp your message on the 1x3 inch piece of cardstock. After this dries, adhere it to the 1.5 x 3.5 piece of cardstock. You now have the closure for the card.

Step 4

Place adhesive on the left half of this piece. Position and adhere it to the front of your card. Put the positive and negative sides of the magnetic disks together. Peal off the seals and place the magnetic disc on the right side of the closure and adhere it to the card. After this sets, the magnets will be able to detach from each other easily.

Step 5

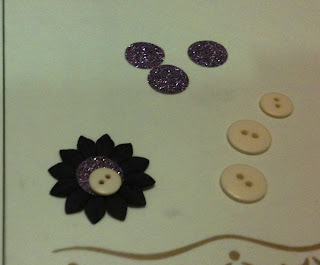
Embellish your card as desired.


Happy Crafting

Sandra


Tuesday, August 23, 2011

Sack Monkeys in Shoreline

Hi Everyone!

What's better than a free event that features a parade, food, and a ton of vendor booths? An event with a Paper Zone booth making free sack monkeys!!
This weekend we joined in to Celebrate Shoreline! and had a great time doing it. The smiling group above walked in the parade handing out candy, coupons and PZ good cheer.

While some of us worked the booth helping little ones make their very own paper sack monkey. Nothing beats the smile of a child with a paper sack on their hand with a big monkey grin on it!

If you weren't able to make the event but would still like to monkey around, here are some quick instructions for making your very own Sack Monkey:

You will need a paper lunch sack (which Paper Zone sells in singles!), some construction paper, adhesive, and googly eyes or black stickers for eyes.

For your convenience we put together this template to use for your monkey ears and mouth. Start by printing and cutting the monkey muzzle. You can trace the ears on dark brown and light brown paper.

To start, cut the mouth in half and use adhesive runner tape on the back to adhere to the paper sack. You'll want to strategically place the mouth on the fold of the "bottom" of the sack so that when your hand is in the sack, the mouth can open and close.

Next, use the adhesive tape to glue the inner ear to the outer ear and then glue the ears to the back of the sack.

Using either googly eyes or black stickers, finish off by giving your little monkey eyes to see. And voila! you've got yourself a sack monkey.

This is a GREAT project for kids of all ages and you can take the project a step further by personalizing your monkey. . .in fact check out the Paper Zone Facebook page to see some interesting paper sack creations of Paper Zone past!

It was great to see everyone at Celebrate Shoreline! We had a fun time!

Kim

Wednesday, August 17, 2011

Candle Wraps!


We just got the new POW! Micro Glitter Paper from American Crafts. This paper is made with a brilliant sparkle that never rubs off and it's backed with a super pliable, thin cardstock. This paper runs through a die cut machine easily and punches perfectly. We have 12 colors in store and 12 new ones on the way! The first thing I thought of when I saw this paper was candle wraps. I wanted to show you how to make both a simple wrap and a more embellished one.Here is what you will need for the embellished one: Two shades of purple glitter paper, one sheet of patterned paper, an edge punch, a hole punch, paper flowers, buttons, adhesive, a paper cutter, and a candle. I used a 6 inch tall candle that I've had for a while. It's a bit of an eye sore so I wanted to pretty it up.


First, I cut a 5 inch strip of the light purple glitter paper, put lots of double sided tape from my ATG gun, and rolled it onto my candle. I found this was the easiest way to prevent air bubbles and make sure it lays evenly.


Next, I cut out two 12" strips from the pattern paper from my large edge punch.


This pattern paper is double sided. One side is patterned and the other is solid. Then I used my ATG gun again to adhere the two strips together. More ATG tape and I used the rolling technique again to adhere the strips onto the candle.


Next, I punched out a few 1/2" circles from the dark purple glitter paper, layered them on purple flowers, and used a light yellow button for the center of the flower. The ATG tape worked perfectly for this. Then using a 3D glue dot (any dimensional adhesive would be fine) I adhered the flowers to the candle right on the pattern strip.


I felt like this candle needed a little something more. I cut out 2 1/2"X12" strips and glued them to the top and bottom of the candle. Voila! This eye sore is now pretty and sparkly!


I found these candles to be too plain. Here is a quick, easy, and simple way to make them pop! You will need two different glitter papers, an edge punch, and some colored 'wraphia'.


First, I cut a 3"X12" strip of the darker colored glitter paper and edge punched one side of it. This is for the largest candle. The other two candles I just adjusted the size of the strips according to their specific size.


Next, I cut a 1" strip in the gold and glued it down in the center of the larger piece. Then using some yellow wraphia, I tied it around the center of the gold and tied a simple knot. I repeated the steps with all three candles.


Happy Crafting!


-Malyse


Wednesday, August 10, 2011

Carve Your Own Rubber Stamp!


One project that I have been wanting to try for years is making my own rubber stamp and I finally got to try it out! Paper Zone has everything you need to get started; Speedball's cutting tool and rubber block.

The first step in creating your rubber stamp is to draw out the image with a pencil and paper.


Then you can transfer the image to the rubber block by simple placing the paper on top of the rubber block and gently rubbing.
Next I went over the pencil transfer with a pen so the image could be more easily seen.
Next using the cutting tool, start cutting away the rubber so that only the image you want remains.
Then it's the moment of truth! Test out your new stamp to see how you did!
I wanted to cover the paper with the zig-zag pattern of my stamp, so I simply stamped it a few times on my paper.
Then, I wanted to make a tag out of the paper, so I simply cut the paper into a tag shape.
Gathered a few supplies.
And created a simple tag.
This was so much fun, I can not believe I waited so long to give it a try! If you are a stamper or simply love anything handmade I would recommend this project!
Happy Stamping,
Christina

I want to give a special thank you to Christi in our Seattle store for inspiring me. She made the most amazing stamps, if you are in Seattle, you must visit the store to see them!


Wednesday, August 3, 2011

Back-to-School Notebooks


I can’t believe it is already August and time to start thinking of going back to school. Not only is the summer flying by quickly, but my kids are getting so big. My son, Braden, will be starting 5th grade this year and my daughter, Amanda, will be a sophomore in college.

Back to school means lots of shopping, but there is always time for some crafting, too! I got the idea for these fun notebooks from my friend, Hue, who works at our Shoreline store. They are not difficult to make, and can be personalized to match your kid’s personalities and your kids can even help make them. Even if you don’t have any kid’s, it is a great way to personalize some stationary for yourself.

As I was talking to Hue, she suggested even making some of these little notebooks out of sticky notes and being able to carry them around in your purse. I love that idea, too.

Ingredients:

1 8.5x11 legal pad
2 coordinating 12x12s
Scoring tool
Assorted Embellishments
Paper cutter
Adhesives


I used Basic Gray, Life of the Party 12x12s, Party Clips, and Ribbon Doilies

Step 1

Score the 12x12 that you want to use as the back of your notebook at 8 10/16 and at 8 14/16. Crease the score lines.
This piece creates the back of your notebook, the left edge, and about a 3 inch front flap. It will look like this, when your legal pad is placed inside.


Step 2

Cut the other 12x12 in half, giving you 2 - 6x12 pieces.

Step 3

Measure and mark one of the 6x12 inch pieces at 7 inches on the left side and 6 inches on the right side. Using your paper cutter, line up the marks and cut. Using a corner rounder, round the top left and right corners and the bottom right corner. This piece will be the pocket.


Step 4

Place adhesive along the inner edge of the other 6x12 inch piece and line up the outer edge of this piece with the outer edge of the other 12x12. Adhere the 6x12 piece to the front flap. You know have your notebook cover

Step 5

Place adhesive on the inside left edge (7 inch side) and bottom of your pocket piece. Adhere this to the top piece of the cover to create a pocket.


Step 6.

Place a generous amount of adhesive on the back of the legal pad. Center the pad on the inside, back cover. Make sure that the left edge of the pad is flush with the score line, so the cover wraps around the legal pad correctly.


Step 7

Embellish the notebook. I used the Ribbon Doilies along the front crease, and stamped my kids initials on cardstock for my embellishments. I also used the Party Clips as tabs for the notebook!


Happy Crafting

Sandra