I would start first by cropping your photos down. I try to trim off areas in the picture that have 'empty' space.
Next, using one of your solid sheets, cut a piece of paper 4.25"X6.25". (I chose to use the yellow paper) This will give your photo an eighth of an inch border. This is where a paper cutter really comes in handy, especially one with a retractable ruler on the side.

After that, cut another paper (I used the green pattern) to 4.75"X6.75". This gives a quarter inch border around the yellow paper. I made the green border wider than the yellow border because I really like the pattern. I will highlight it again on the second page.

Now once you have both pieces cut, it's time to glue them together. First, using your double sided tape gun, adhere the photo to your yellow paper. Then, adhere the yellow paper to the green paper.

Then make sure the border width is even around the photo.

I always like to make comment boxes to add to my pages. This is a great way to recall a memory or to explain what is going on in the photo. (Since these are pictures of me when I was a kid, I will leave them blank for my mom to fill in!) First, cut a yellow square 2.5"X3.5" and place it on a green piece that measures 2.75"X3.75" so it, too, will have an eighth of an inch border.

The last thing to do for this page is adhere the photo and comment box to the 12X12 paper of choice. Here is where the first type of scrapbooking I like to do comes in. I will not add any additional embellishments to this page. As you can see below, the 12X12 background paper is already pretty busy, so I use that to my advantage. When you have such a pretty designed paper you might as well show it off. I like to keep things simple, but that's just me. You can feel free to add more to it as you see fit.

Now I will show you how to add embellishments while we make our second page. I used a solid blue 12X12 as the base of the page and I will add strips of pattern paper and pieces from the Emellishment Box to dress it up. Cut a strip of the same green pattern paper you used for the previous page that measures 12"X3" and set it aside.

Now comes the fun part! The Embellishment Box in this line is full of ribbons, paper flowers, rhinestones, buttons, and more.

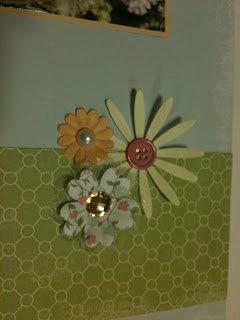
I decided to make three different types of flowers. I adhered a pearl to the center of an orange flower, a gold rhinestone to the center of a patterned flower, and a button to the center of the yellow paper daisy.

Now it's time to put your second page together. Start off by adhering the green strip vertically to the right side of your 12X12 base paper about an inch in from the edge. Next, arrange your flowers, photos, and comment box in such a way that is appealing to you. In the pictures below, you can see how I did this.


Below, you can see the finished double page spread. It would now be ready to slide into a 12X12 scrapbook for everyone to see and enjoy! Happy crafting!


Wow! That's really cool. It would be useful for someone lacking artistic talent such as myself.
ReplyDelete