Showing posts with label tiny letters. Show all posts

Tuesday, April 5, 2011

Upcycle and Tiny Type: In Use

Hi all
I was so excited to get my hands on the new goodies from Cosmo Cricket and to put it to use. I want to share with a you a few ways I used this fun new product!

Fist up: Super Simple Card!
All you need for this card is a piece/strip of the borders paper, a circle punch, the yellow sheet from the Mini Deck, Tiny Type stickers and some glue.

First punch the designs out of the paper with the circle punch. (tip: use your punch upside-down so you can exactly where you are punching!)

Next add a sentiment to one of the circles with the Tiny Type stickers.
Finally glue the circles to your card. Wasn't that easy? (I used some foam adhesive to stick one of the circles to the card to add a little dimension.)

Next up: 12x12 Scrapbook Page!
For this project I used the 12x12 paper, Mini Deck, stickers and Tiny Type from the Upcycle line.


First take the alphabet paper out of the Mini Deck and cut apart the letters for the title.
Next arrange the elements on the base paper. (I used a few strips cut from the Border 12x12 sheet and a pink page from the Mini Deck.)
After arranging the elements on the page glue down. (I used some foam adhesive to pop up a few of the letters in the title to add some dimension ,just like I did on the card.)

Next take the clear Tiny Type and element stickers to finish the title.
As you can see I used the Tiny Type to spell out 'cutie' on the pink label sticker.With that you have a finished page!
I would love to see what you make with this super cute paper and stickers!
Happy crafting, Christina

New Upcycle & Tiny Type: In Stores Now!

Upcycle is a new and very fun line from Cosmo Cricket! It has a retro yet girly appeal to it. This line includes eight double sided 12X12 patterned papers, a paper crafting kit, a 6X6 mini assorted deck, buttons, butterflies, stickers, jewels, and chip board embellishments. This line gives off a springy feel with the bright, bold shades of fuchsia, mustard, turquoise, and chartreuse, sure to make any project fabulous!

Here is just a taste of the gorgeous new paper:


Below, you can see the coordinating embellishments.


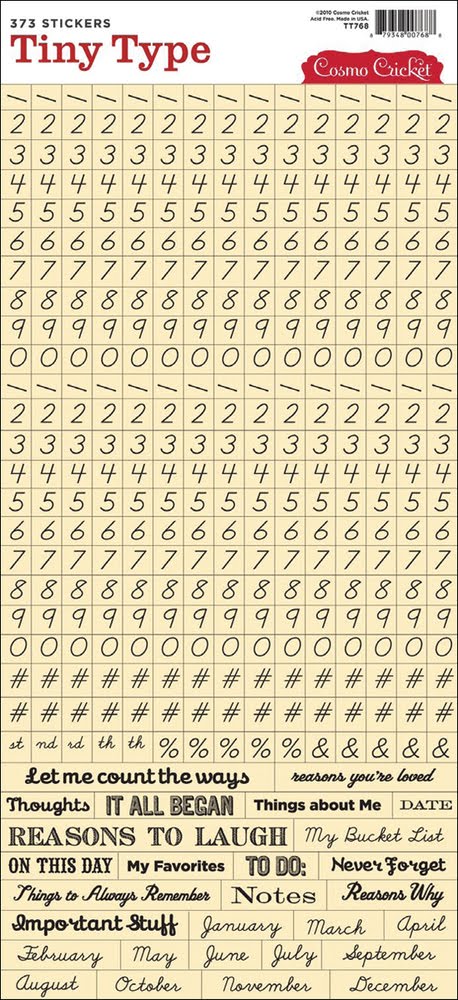
Cosmo Cricket also has ten new Tiny Type letter formats. They come in a variety of fonts and colors and each package also contains some really cute images and sayings. My favorite item of the new line are the Tiny Type Numbers! They, too, come in a variety of fonts and colors including black, cream, and clear. Some of these colors coordinate with the Upcycle line, too! Tiny Type is a cute and easy way to add lettering to any project!


All of the items seen here and more are now available in all nine of our stores! To see some fabulous crafting ideas by Cosmo Cricket, please visit their blog here.


___________________________________________


By the way....


We are having a blog follower contest, now through the 11th of April. To celebrate the 1 yr anniversary of the PZ blog, we will be selecting one follower of our blog at random to win a $20 Paper Zone gift card! If you are not already a follower, but are interested in joining, here are some easy steps to follow:


1. At the top of the home page of this blog, you will find a button to 'sign in'. If you already have a Google account you can sign in, if not you will need to create a Blogger account by clicking on 'get started'.


2. You can use any email address to create your account. Once you fill in the information and click 'create', your profile account will pop up. If you scroll down you will see an option to add blogs to follow.


3. Click on 'add' and type in our blog address: http://www.paperzoneblog.com. You will have an option to follow publically or anonymously. Click 'follow' and you are done! Wasn't that easy?!


You are now a follower of our blog! Congrats and good luck with the contest!


Happy Crafting! -Malyse

Friday, January 7, 2011

Tiny Letters

I love Valentine's day. I have always been pretty sweet on the Valentine's day festivities but what really sold me on the holiday was the mailboxes we used to make in elementary school for all of those candy-filled card. Now I loved the candy but what I loved even more was all the possibility in that box full of tiny envelopes. So I thought this year I would make a card about all of those little envelopes.

To make this card start by rounding up some supplies. I used:

- the Marvy Jumbo Heart punch (the green guy)
- the Marvy Clever Lever mini envelope punch
- a Quickie Glue Pen
- the Dear Lizzy Christmas Letter rub-ons (mini marks by American Crafts work just as well)
- 1 sheet of Stardream 105lb cover in gold (antique gold is a nice option for a little less glitz)
- 1 sheet of Gmund Savanna's beautiful wood grain bubinga paper
- one sheet of the Speckletone oatmeal paper (I used text weight but card stock works just as well)
- some red, pink, and white scraps. The white scraps (you'll need three of them) should be 1.25" squares.


1) Cut the wood grain paper to 7x10" and scoring it down the middle to make my 5x7 card.


2.) Cut a 4x6 rectangle from the gold paper and glue it into the inside of your card as a liner.


3). Punch a mini-envelope from the left over gold paper. While you have the envelope punch in your hand go ahead and punch out 3 more from the oatmeal paper.

4.) Glue the envelopes together (this is where the tiny glue pen comes in handy), be sure you leave one end open for the messages.

5.) Once the envelopes are glued together and look like envelopes arrange them on the front of your card. I put the oatmeal envelopes in a small arc toward the top and then the gold one nestled underneath them.

6.) Take your 1.25" square pieces of paper and transfer "I love you" breaking them up over the three pieces. Place these 'tiny letters' in your oatmeal envelopes gluing the bottom back edge so that they stay.

7.) Punch out as many hearts as you would like. I find that 12 or 13 does nicely to create a cascading effect on the front of your card. Using the glue pen trace the edges of the hearts and starting at the bottom arrange 3 in a pile at the bottom edge of your card. From there I put one peeking out of the gold envelope. Then just connect the pile to the envelope with a cascade of hearts.

For a fun finishing touch I put one extra heart on the corner of the gold lining.
And there you have it; a grown up Valentine that reminds me of all those little envelopes in my mailbox as a kid. --Allie, Bellingham PZ