We just got the new POW! Micro Glitter Paper from American Crafts. This paper is made with a brilliant sparkle that never rubs off and it's backed with a super pliable, thin cardstock. This paper runs through a die cut machine easily and punches perfectly. We have 12 colors in store and 12 new ones on the way! The first thing I thought of when I saw this paper was candle wraps. I wanted to show you how to make both a simple wrap and a more embellished one.
 Here is what you will need for the embellished one: Two shades of purple glitter paper, one sheet of patterned paper, an edge punch, a hole punch, paper flowers, buttons, adhesive, a paper cutter, and a candle. I used a 6 inch tall candle that I've had for a while. It's a bit of an eye sore so I wanted to pretty it up.

First, I cut a 5 inch strip of the light purple glitter paper, put lots of double sided tape from my ATG gun, and rolled it onto my candle. I found this was the easiest way to prevent air bubbles and make sure it lays evenly.

Next, I cut out two 12" strips from the pattern paper from my large edge punch.


This pattern paper is double sided. One side is patterned and the other is solid. Then I used my ATG gun again to adhere the two strips together. More ATG tape and I used the rolling technique again to adhere the strips onto the candle.
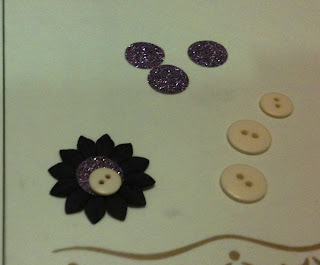
Next, I punched out a few 1/2" circles from the dark purple glitter paper, layered them on purple flowers, and used a light yellow button for the center of the flower. The ATG tape worked perfectly for this. Then using a 3D glue dot (any dimensional adhesive would be fine) I adhered the flowers to the candle right on the pattern strip.

I felt like this candle needed a little something more. I cut out 2 1/2"X12" strips and glued them to the top and bottom of the candle. Voila! This eye sore is now pretty and sparkly!

I found these candles to be too plain. Here is a quick, easy, and simple way to make them pop! You will need two different glitter papers, an edge punch, and some colored 'wraphia'.


First, I cut a 3"X12" strip of the darker colored glitter paper and edge punched one side of it. This is for the largest candle. The other two candles I just adjusted the size of the strips according to their specific size.


Next, I cut a 1" strip in the gold and glued it down in the center of the larger piece. Then using some yellow wraphia, I tied it around the center of the gold and tied a simple knot. I repeated the steps with all three candles.

Happy Crafting!
-Malyse