Showing posts with label Valentine's Day. Show all posts

Monday, February 14, 2011

Last Minute Valentine

Happy Valentine's Day!
If you have found yourself unprepared for this lovely day (I know, I know, I couldn't resist!)
I've got you covered!
Here is a really simple but sweet project that you can make for your one true love, or a whole office full of sweeties!
To make these paper flags simply cut one inch strips of paper, decorate and glue to toothpicks... then stick into treat and you are good to go!
xoxo
Christina

Monday, February 7, 2011

Pails of Hearts & Kisses

Valentine's Day is officially one week away! We've tried our best to inspire you with tons of fun and crafty Valentine ideas so you are prepped for the day ahead. We've showed you tips on how to create adorable Valentine cards with tiny envelopes, showed you the ins and outs of creating your own embellishments with Fimo Dough, made pink paper pinwheel toppers, and taught you how to make your own paper flower bouquet. This past weekend, I made these fun little Valentine gifts for my friends - and so far - they've been a hit with everyone, so I figured I'd share the idea with all of you!


I've been eyeing these clear pails for awhile and love the idea of filling them with little Valentine treats and goodies. We showed them a while back filled with cookies (also a great Valentine's Day idea), but I kept it simple by buying little heart shaped chocolates and kisses to fill mine. To decorate my tin, I gathered some of my favorite things ~ rhinestone and pearl embellishments, red glitter paper and some oh-so cute Martha Stewart Valentine ribbon.


Step 1. Decorate the lid with the glitter paper, simply trace around the lid, cut out your circle and adhere to the top.


Step 2. Wrap a ribbon around the tin (put adhesive on the ends of the ribbon to attach). I placed little rhinestones and pearls on the ribbon, they come with adhesive on the back so this part is super quick and easy.


Step 3. For the handle decor, I cut a bunch of 2" pieces of ribbon and just tied them on, varying the colors. I filled it with yummy chocolate hearts and kisses, and put a cute little Valentine gift tag on the handle.

There you have it, a sweet little homemade gift to give to your special Valentine{s}. And, trust me, people adore getting these - I already started giving these to my friends and they just love them.

♥ Happy {early} Valentine's Day! ♥ --Lauren


Sunday, January 30, 2011

5 More "Love Inspired" Ideas

There have been so many gems of inspiration coming from the stores that I picked 5 more easy ideas that can help you create a lasting memory this Valentines Day.

1. Paper Lanterns. Planning a romantic dinner? How about you light the room with candles and paper lanterns? This lantern is truly so easy! Instructions on how to make it are here. Put your candles in glass votives so that you don't have firemen joining your dinner.

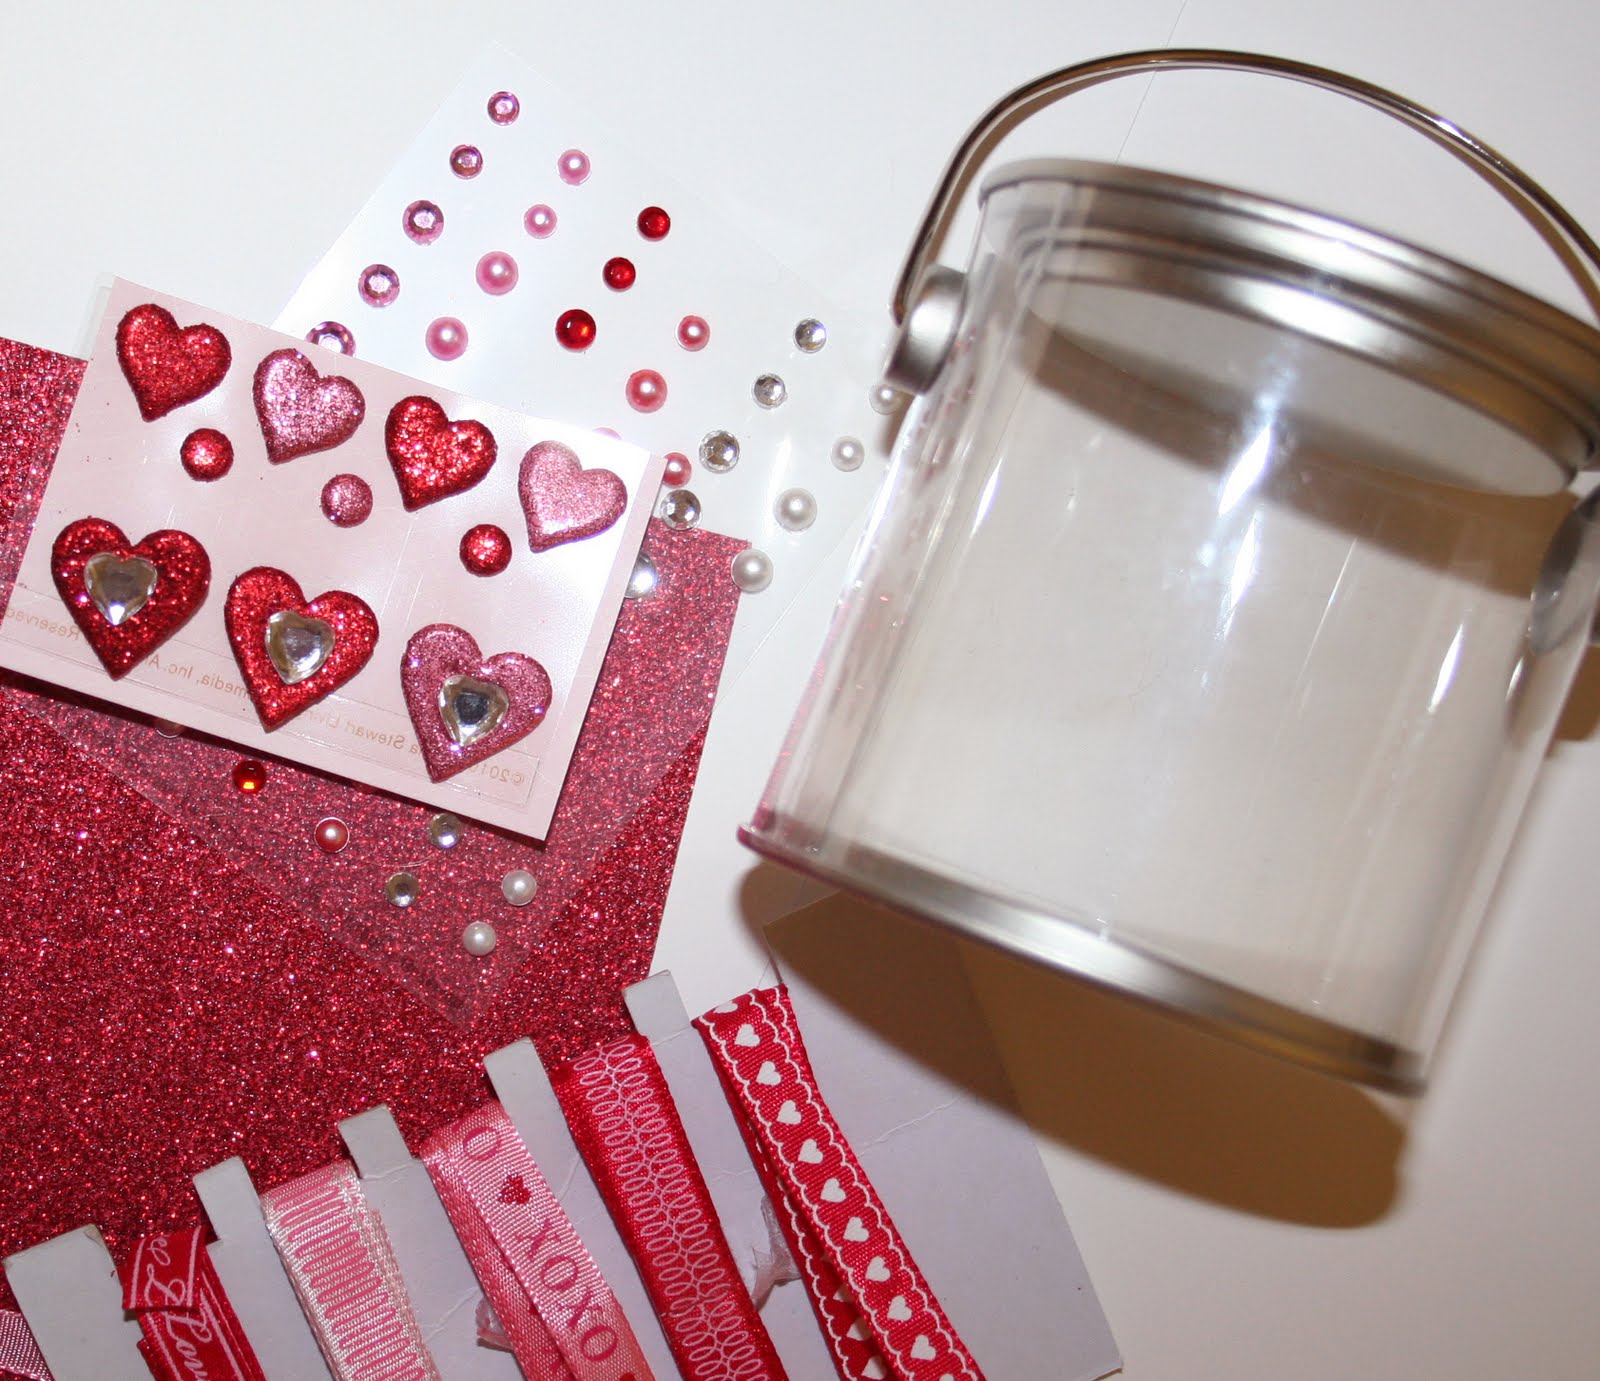
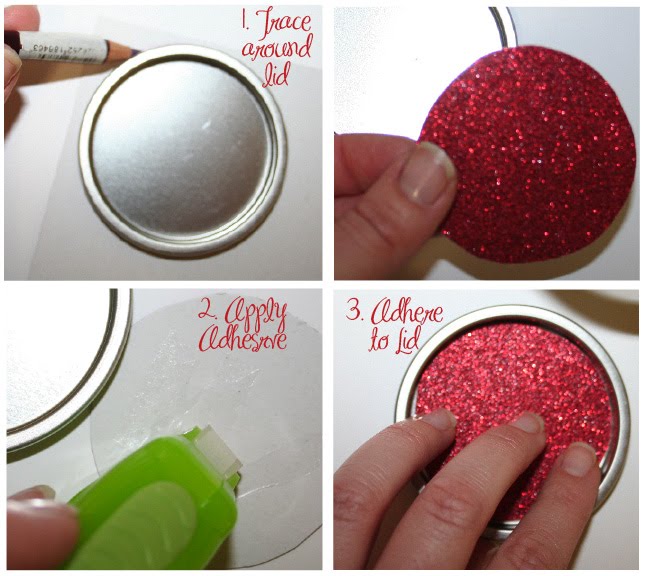
2: Pails in Comparison: These cute little pails almost look like a wedding cake! Clear pails can be lined with any design of paper and embellishments to personalize your gift. Fill them with homemade cookies, candies or love notes. A past post featuring a cookie recipe is a great inspiration for a unique, heartfelt gift.

3. Fimo! We love what Christina has done with Fimo. So versatile you can make Valentine ornaments (why not?!?) or this gorgeous card. Click the links for instructions. And how brilliantly easy is it to use pieces of decorative tape as a background?? love it! P.S. Be sure to sign up for our email list if you want to hear about a free upcoming Fimo demo in our Seattle store!

4. Buckle up your love. Easy as using a paper punch and some ribbon and you have a wonderful little embellishment to add some love to your wrapped gifts.

5. Message in a Bottle: Give your sweety a vial filled with sand from where you got married; dirt from a hike that made your day; a note telling them all the qualities you love about them; or something whimsical like fairy dust (glitter). The possibilities are endless.

Create something special in your life! --Kim

Monday, January 24, 2011

Perfect Paper Pinwheels

{pink pinwheels}
Pinwheels have been popping up all over, we saw a lot of adorable pinwheels at the Seattle and Portland Wedding Shows this year. They are such a fun little decoration, look at how cute these are as cupcake toppers:

And they make the perfect little wedding place card for a whimsical Spring wedding:

{floral pinwheel place cards)

The best thing about these is how easy they are to make, and inexpensive too - you can get four pinwheels out of just one 12x12 sheet! These are great for weddings, kids' birthday parties (think Circus/Carnival theme!), baby showers, bridal showers and - since the day of love is right around the corner - Valentine's Day. I always like to give small gifts to friends and family on Valentine's Day to show them my appreciation, and I think a little Valentine cupcake with a pinwheel topper will be perfect. Ready to make your own? Here you go:

Step One: Gather your supplies:
-12x12 Paper (1 sheet=4 pinwheels)
-Scissors (I like the cloud-edged ones for a scalloped edge effect)
-Brads (just 1 per pinwheel)
-Ribbon (optional, but a very cute addition!)
-Stick for the base (I used a chopstick that I found in my junk drawer)


Step 2: Cut your 12x12
paper in half, then cut those pieces in half
-Each of the 4 squares should measure 6" x 6"


Step 3: With a ruler, draw a line from each of the corner points (diagonally) and then draw a circle around the center point


Step 4: Cut each line, stopping when you get to the edge of your circle


Step 5: Punch a small hole in each of four edges and in the center


Step 6: Using your brad, start threading it through each punched hole
-If you want to add ribbon, put that on the brad first before you put it through the paper
-When finished, secure your brad on the back by opening the edges.


Voila! You have created your pinwheel! Now, you just need to secure the pinwheel to the stick (I used glue on mine). If you want to create a fully functioning/spinning pinwheel, simply replace the brad with a pin and it will spin in the breeze. Easy and fun to make, enjoy! --Lauren