Showing posts with label Martha Stewart. Show all posts

Saturday, December 24, 2011

Day 24: Tissue Puff Balls

This is a great project from last years 12 Day's of Christmas blog series. These are perfect to use as present toppers or decorations for your holiday - we couldn't leave this project out!


Here is a simple video tutorial showing you how to make the puffs:


Step One:

Take 3 sheets of tissue, crease and cut it in half at the crease to create 6 smaller sheet. Stack the 6 sheets and accoridan fold them.
Step Two:
Fold the piece in half to create a crease so you know where the center is. Using scissors, cut the edges off in a rounded shape. Tie ribbon, string or fishing wire around the center where you made the crease.
Step Three:Peel away each layer of tissue one sheet at a time to finish your puff ball ornament!These have a fun, whimsical look to them and the adorable candy cane striped tissue and blue snowflake pattern make them even more festive for the holidays!

Monday, November 28, 2011

Glitter Window Holiday Cards

I have been stamping and card making for many years and today I would like to show you a fun technique that I learned a long time ago that is always a wow when giving a card.

You will need:

- Cardstock

- Punch - here I am using the Martha Stewart Anywhere Snowflake. I love this punch, because it is magnetic - you can place it anywhere on a piece of paper. You don’t have to worry if it will reach or not!

- Packing Tape

- Glitter

Cut your cardstock to fit the front of your card.

Place the punch in the center of the cardstock piece. To line this up nicely, I put the bottom of the punch on the back of the cardstock piece and make sure it is lined up evenly with the sides of the cardstock. Then you can place it on the top of the punch and the magnets with secure it together. Punch your shape.

Put your cardstock on a slick service, here I am using a glass mat. You could just use a piece of acetate or a plastic bag. The point is to not have the tape stick to your table. Place a piece of packing tape over the punched shape with the sticky part facing out the front of the card. Press into place.

Turn over the card and pour glitter on the tape. Burnish the glitter into the tape and pour the rest back in the bottle.

You can now mount your completed piece on the front of your card. If you don’t mind the tape on the back, you can do this technique on the front of the card so the recipient will see through the front to the inside of your card.

I finished my card by stamping a Christmas greeting. I love cards that are simple with that wow factor. You could definitely make 100 of these cards to send to everyone on your Christmas card list.

Happy Stamping!

Whitney

Tukwila Paper Zone

Thursday, October 27, 2011

Sparkly Spider Treat Box

Here is a quick and adorable project for those special trick-or-treaters, or perhaps a party favor for your Holidays guests.

First, let’s make sure we have all our supplies:

Trimmer

12x12 Patterned cardstock

Glitter Paper

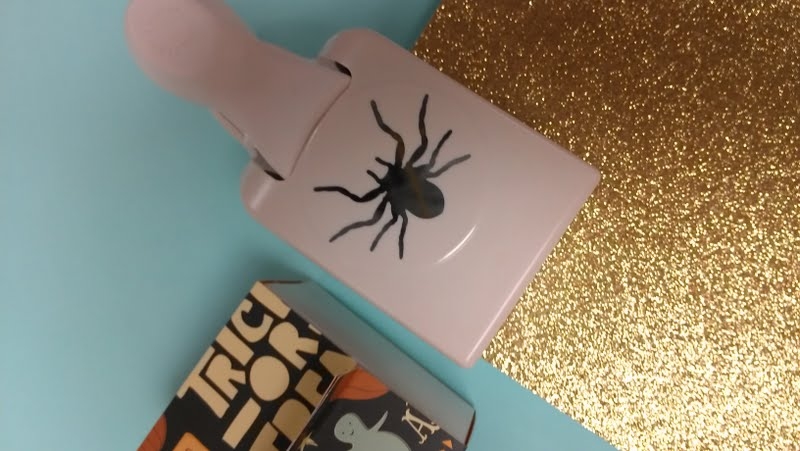
Martha Stewart spider punch

Jute, twine or ribbon

Adhesive/Glue

3x2 box

Next, we are going to take your 12x12 patterned cardstock and cut it to 3”x12” .


You are now going to take that strip and score it at 1”, 2.5”, 4.5”, 7.5”, 9.5” and at 11”.

This will allow it to wrap beautifully around your 3x2 box full of goodies.

Add your favorite adhesive to the 1” end, wrap around your box and adhere.

Now we are going to punch out a couple of spiders, using the Martha Stewart punch.

Take two of these spiders and put them back to back so you can see it nicely from both sides.

Adhere the “bottoms” and back legs together, leaving the head and front legs not adhered. This will allow you to now put the spider over the corner of your box topper.

We are almost done! Wasn’t this easy?!

Now tie some jute, twine or ribbon around the boxes topper.

Add a tag and WALLAH!


You are done!

Leave us a comment and let us know how your project turned out!! We’d love to hear about it!

XO,

Shoreline Paper Zone

Friday, March 18, 2011

Brown Bag It!

Spring is officially only 2 days away and I am so ready for it! I love that the days are getting a little longer and that we have that extra bit of time at the end of the day to go outside and enjoy the sunshine (I know...wishful thinking here in Seattle). I came across this cute idea for a paper bag flower bouquet and thought it was so cute, I had to share it with you!


Spring is the time of Easter brunches, birthday parties and baby showers and this is an adorable way to decorate a table at a party with fresh, bright flowers. It's a table decoration, a place card {write each guest's name on the bag}, and a party favor all in one! All you need is an adhesive, a brown paper lunch bag and some scissors or decorative paper edger.


Step 1: Draw lines on the bag like this:


Step 2: Cut along the lines, using either scissors or decorative paper edgers.

Step 3: Place adhesive on the inside of one of the "handles" and then overlap the two flaps and adhere them together to form the handle.

Step 4: Take a small glass or jar filled with water, place it in the bag and place your flowers inside.

Look at how cute these all look placed on the plates on a table, one for each guest. I just love this idea, it's pretty and elegant, yet super simple and easy. These would also be great for weddings, changing up the flower colors based on your color palette. And, at only $0.15 per bag, it's a really cost-effective decoration!

(photo from marthastewart.com)

Happy {almost} Spring everyone! --LaurenCheck Spelling

Monday, February 7, 2011

Pails of Hearts & Kisses

Valentine's Day is officially one week away! We've tried our best to inspire you with tons of fun and crafty Valentine ideas so you are prepped for the day ahead. We've showed you tips on how to create adorable Valentine cards with tiny envelopes, showed you the ins and outs of creating your own embellishments with Fimo Dough, made pink paper pinwheel toppers, and taught you how to make your own paper flower bouquet. This past weekend, I made these fun little Valentine gifts for my friends - and so far - they've been a hit with everyone, so I figured I'd share the idea with all of you!


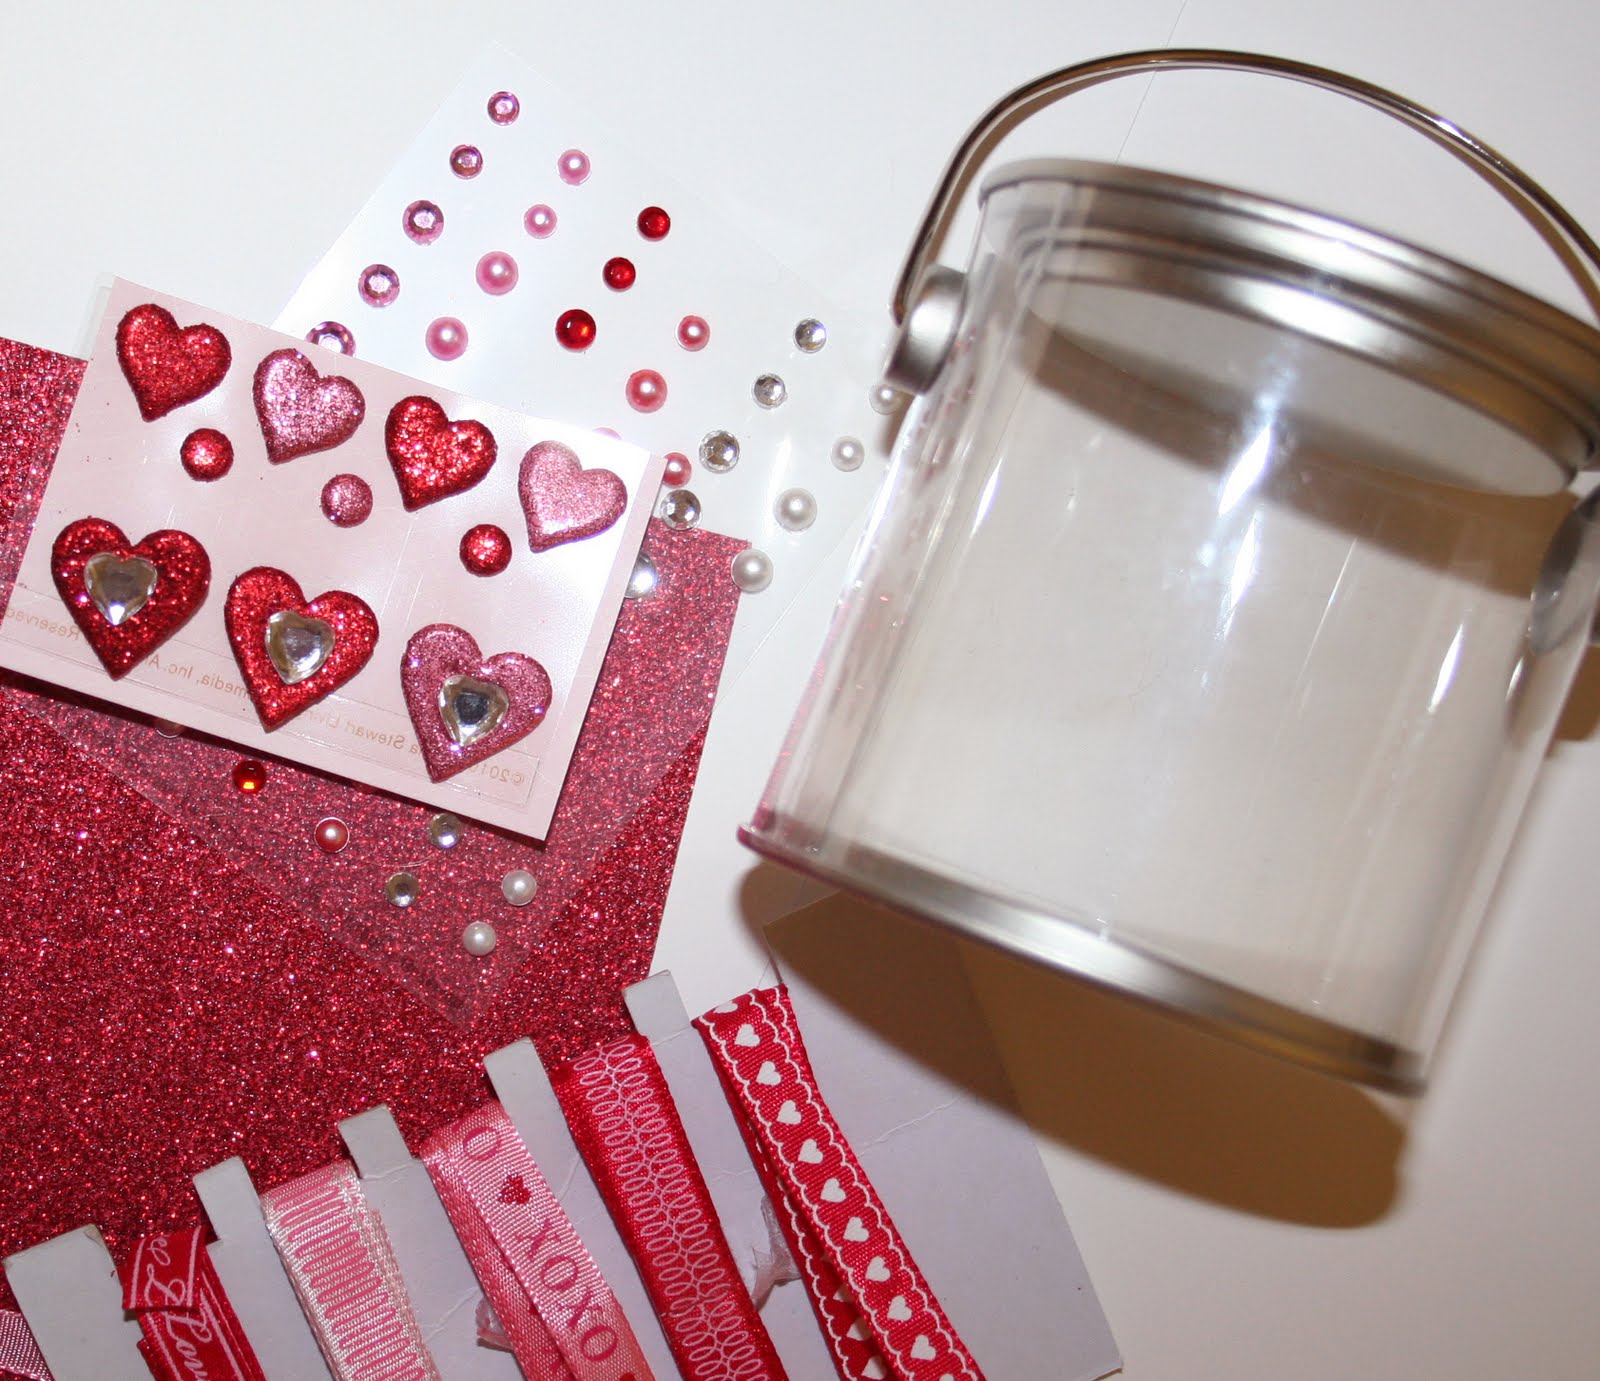
I've been eyeing these clear pails for awhile and love the idea of filling them with little Valentine treats and goodies. We showed them a while back filled with cookies (also a great Valentine's Day idea), but I kept it simple by buying little heart shaped chocolates and kisses to fill mine. To decorate my tin, I gathered some of my favorite things ~ rhinestone and pearl embellishments, red glitter paper and some oh-so cute Martha Stewart Valentine ribbon.


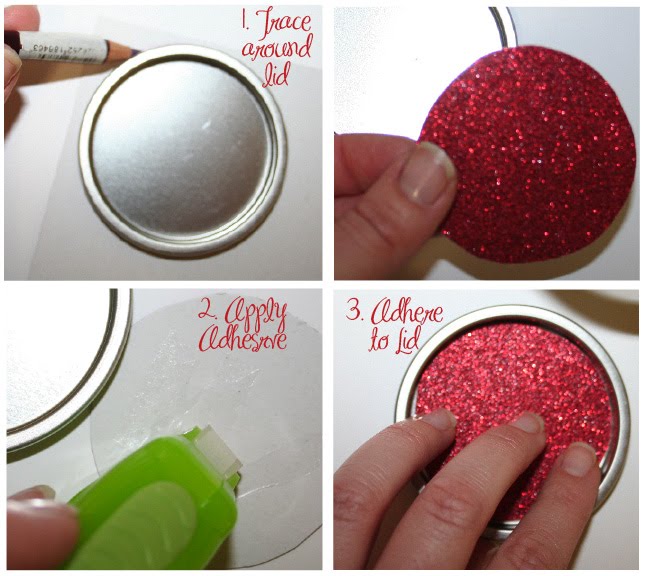
Step 1. Decorate the lid with the glitter paper, simply trace around the lid, cut out your circle and adhere to the top.


Step 2. Wrap a ribbon around the tin (put adhesive on the ends of the ribbon to attach). I placed little rhinestones and pearls on the ribbon, they come with adhesive on the back so this part is super quick and easy.


Step 3. For the handle decor, I cut a bunch of 2" pieces of ribbon and just tied them on, varying the colors. I filled it with yummy chocolate hearts and kisses, and put a cute little Valentine gift tag on the handle.

There you have it, a sweet little homemade gift to give to your special Valentine{s}. And, trust me, people adore getting these - I already started giving these to my friends and they just love them.

♥ Happy {early} Valentine's Day! ♥ --Lauren


Monday, September 20, 2010

Fringe It!

Ah fringe...for some reason or another that word always seems to conjure up images of hippies frolicking through the fields, flowers in hair and suede fringed jackets on their backs. It also reminds me of Minnetonka shoes, another flower child favorite. But I digress. Fringe has more than 60's era connotations. Just take Martha Stewart's Fringe Scissors, for example.

Man alive these things are great! Talk about endless uses. You can make grass, hair, confetti, snow, whiskers, funky looking ribbon to decorate packages, and more! You can even use the scissors to shred documents. With the holidays fast approaching Martha's Fringe Scissors are sure to be a go-to item. So come check them out and tell us what you envision doing with your fringe and if it somehow involves skipping through a field so much the better.

Peace!

Tiffany

Tuesday, June 8, 2010

Tissue Puff Balls

I just love these tissue puff ball decorations and I think they're the perfect way to add a little color and pizazz to a party. Think of how cute these red, white and blue puff balls could be hanging from trees at a 4th of July BBQ or picnic. The best part is that you can get 4 large puffs out of each roll of tissue paper (only $3.99) so it makes for a super inexpensive decoration that makes a huge statement.

We've included a link to our video with instructions to show you just how easy these are!

Step One:
Open the roll of tissue and cut it in half at the crease. Stack 9 of these tissue sheets and accoridan fold them.
Click Here for Step One Instructional Video.


Step Two:
Fold the piece in half to create a crease so you know where the center is. Using scissors, cut the edges off in a rounded shape. Tie ribbon, string or fishing wire around the center where you made the crease.
Click here for Step Two Instructional Video.

Step Three:
Peel away each layer of tissue one sheet at a time to finish your puff ball!
Click Here for Step Three Instructional Video.

These decorations would also be a great addition to a birthday party, summer garden party or even for a wedding! Look at these great ideas from Martha Stewart: