
Just in time for summer, kids craft kits have arrived at Paper Zone! Because these kits are new products for us, I was anxious to try them, and, I admit, the label (above) sucked me in!

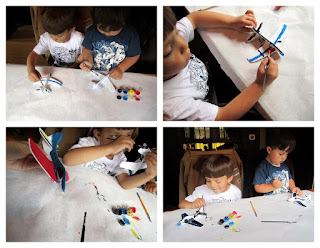
So, I stopped by the Seattle Paper Zone and picked up two kinds of kits: the "Foam Fliers" and the "My Hand Prints". Next, I obtained two willing participants (left), my super awesome nephews Dorian and Dominic.
The first kit we tried was the Foam Fliers. Being that you get 4 planes for $5.99, I really thought this was a great bargain.
 The kit includes 4 easy-to-assemble planes, a paintbrush and some paints. I must admit we had to pilfer paint brushes from the My Hand Prints kits so you may want to pick up some spare brushes in order for everyone to have fun
  at the same time.
Tip #1: put down some butcher paper to protect your work surface, although I found this paint really easy to wash off, which was great!
After quickly assembling the planes, we went to work painting. This is creativity at its best! I was actually pretty impressed that the paints were more than enough to cover the entire body of all fou
 r planes. . .no skimping here!
During this test, we proved that both the kids and the adults had a great time creating their signature flier.
I purposefully made mine look more childlike so that the boys didn't get too jealous of my plane.
After about 30 minutes of painting fun, we set our planes out to dry. We had some pretty impressive results (below). I would say the planes fly 'okay', but you can't beat the easy assembly, the painting fun and it was a great family activity.
 Up next: My Hand Prints. I have to say right off the bat the boys' mom was excited by this one. Really, this is an adorable way to take a snapshot of a moment in time.
This kit
 was so easy and mess free! I was prepared for a sticky, gooey mess, but the clay came out of the packet in one lump, stayed in a lump, spread easily and was great to work with.
First off, pat the clay into a size that will fit the hand print (or paw print) of your subject. Next, carefully press the widdle hand into the clay. I helped by adding extra pressure to their small fingers and got an incredible print. You could read their palm from the imprint it was so clear!
Tip#2: the instructions don't provide any guidelines, but I'd recommend using a wax paper below the clay when pressing. The first go on the butcher paper stuck and we had a re-do. Luckily that was not problem.
 Before setting the prints aside to dr
 y, I quickly used the handle of the paint brush to poke a hole in the print so later it could be hung and displayed (ribbon included in kit!).
The instructions says the clay hardens in 2 hours by air drying, but we let the prints dry overnight and they were still a bit soft. Even though they were soft, they were ready to paint and any new impressions quickly disappeared so it was actually pretty neat.
More painting fun! The hand painting was just as fun as the the foam planes and I have to say the boys got a little artsy on me with these which was awesome! What was great about having both kits is we had a whole bunch of colors to choose from too.

And the end result. . . .look at those smiles!! Thank you to my testers: Little D and Big D for testing our products and reminding me how simple things can be so much fun. It was a great afternoon and morning of crafts that I hope you all can enjoy with your friends and family! --Kim

This is the perfect activity to keep active kids focused and entertained. I have a couple of nephews who I'm sure will love this!
ReplyDelete