Dear Valued Paper Zone Customers:
As you may have heard, we will be closing all of our Paper Zone locations. After receiving an overwhelming outpour of concern, we felt compelled to further explain our unfortunate situation. Paper Zone is a company with 20 year roots in the Northwest. We are based in Seattle, operating eight retail locations throughout Oregon and Washington. However, due to the current economic downturn, we have experienced three years of sales declines between 6-8 percent annually. As a small local retailer we were unable to sustain these losses.
We have appreciated being a part of so many significant life moments. We have had the privilege of helping brides create their wedding invitations, parents announce the birth of their children, restaurants displaying their menus, artists presenting their work and so much more. On behalf of our 67 employees, we want to thank you for your years of loyalty and support during our final days. Please continue to shop local and support other small businesses!
Sincerely,
The Paper Zone Management Team

Thursday, December 29, 2011
Sunday, December 25, 2011
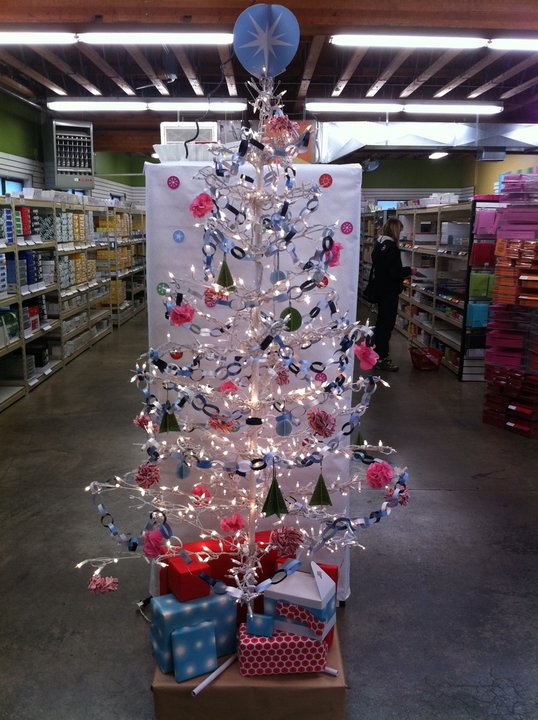
Merry Christmas!
Thank you for following along with us as we have celebrated the season by sharing a post a day with you for the last 25 days. We have enjoyed creating this season and hope we have inspired you along the way.
photo via balzerdesigns.typepad.com
Merry Christmas!
Paper Zone
Saturday, December 24, 2011
Day 24: Tissue Puff Balls
This is a great project from last years 12 Day's of Christmas blog series. These are perfect to use as present toppers or decorations for your holiday - we couldn't leave this project out!

Here is a simple video tutorial showing you how to make the puffs:
Step One:
Take 3 sheets of tissue, crease and cut it in half at the crease to create 6 smaller sheet. Stack the 6 sheets and accoridan fold them.
Step Two:
Fold the piece in half to create a crease so you know where the center is. Using scissors, cut the edges off in a rounded shape. Tie ribbon, string or fishing wire around the center where you made the crease.
Step Three:Peel away each layer of tissue one sheet at a time to finish your puff ball ornament!These have a fun, whimsical look to them and the adorable candy cane striped tissue and blue snowflake pattern make them even more festive for the holidays!
Friday, December 23, 2011
Day 23: Vest & Mitten Card

Materials:
- Mitten Template
- Vest Template
- Twine
- One sheet of solid paper
- One sheet of patterned paper.
- Scissors/Paper Trimmer
- Adhesive

Step #1:
You will want to cut the solid paper to 5"x7" and you will also want to cut a 5"x7" patterned piece.

Step#2:
Use the vest template to cut out the arm holes from your patterned paper.

Step #3:
And once the arm holes and neck are cut out from the patterned piece glue the two 5x7 pieces on top of each other sandwiching the twine between them.

Step #4
You will then want to cutout your mittens from the patterned paper. I used scraps of the solid paper to back the mittens and hold the twine against them.
Now you have your sweater vest card all set. As always use glimmer mist or liquid pearls to make your finished product extra delightful.
Many thanks,
~Bellingham
Thursday, December 22, 2011
Day 22: Fork Ribbon

Hi Everyone
I came across this amazing little tutorial on Pinterest on how to make the perfect little bow using a for. This is perfect for last minute cards or to put on gift cards.
Happy Crafting
Sandra
Wednesday, December 21, 2011
Day 21: Ribbon Tree

Hi Everyone
Closer and closer to Christmas we come! I found this cute little tree made out of ribbon. It is easy to make and I thought would be cute as a little ornament or as a decoration on a present.
Step One:

Cut 3 strips of green ribbon to 7 inches in length, 1 strip of glitter ribbon to 7 inches in length, and 1 strip of brown at 5 inches in length.
Step Two:

Place two adhesive dots at the mid point on the ribbon.
Step Three:

Fold over the ends of the ribbon to attach them to the glue dots. Add another glue dot near the center of the ribbon.
Step Four:

Fold the ribbon over again and arrange in a "V" shape. Repeat steps 2-4 with the two remaining green ribbon strips.
Step Five:
Fold the brown ribbon in half and secure the pieces together with a glue dot. Attach the green "V"s to the brown ribbon.
Step Six:
Tie the glitter ribbon in a bow and attach to the top of the tree.
Wishing you all a Happy Holidays.
Happy Crafting
Sandra
Tuesday, December 20, 2011
Day 20: Christmas Tags

Step 1:
Start with the EK Success Flourish Square punch. I like my base for these tags to be the French Paper Company's Kraft but some of the members of the store prefer metallic paper for their own festive tags. The beauty of this design is you can combine whatever your little heart desires. So go crazy! That being said; we used Kraft paper and a lovely 12x12 from the Nordic Holiday line.

Step 2:
Punch out 4 squares from your base paper (the Kraft) and 2 from your top paper (the Nordic Holiday). Cut the top papers in half. The great thing about the flourish square is it has a small point in the middle of each side of the square to help you line up the cut and then line up the half square with it's base square, which is the next step.


Step 3:
Tack the two squares, one half and one whole, together with a bit of glue.

That is the fundamental of your tag. From there you have complete license to decorate them however you would like. However I think they look more finished if they're wrapped with a bit of baker's twine. I am a little crazy for all things Martha and she's come out with a lovely holiday baker's twine set. That is what I used to wrap our cards.
You start with the back of the tag putting a small dab of glue to anchor.

Monday, December 19, 2011
Day 19: Sparkle Tree Card

Materials:
Cardstock, dark color
Rhinestones, 3mm
Gem Tac glue or other adhesive
Fine tip embossing tool
Silver thread
Sewing Needle
Step #1:
Free draw a ‘loopy’ Christmas tree (similar to this template).
Step #2:
Place on top of cardstock and with your embossing tool, lightly trace around the drawing – making an impression of your design into the cardstock.
Step#3:
Using a white pencil, draw dots on your design to indicate where to place rhinestones.
Step#4:
With glue, affix rhinestones to the card. Draw a star on top of the tree. With silver thread and needle, poke holes in the cardstock & sew the ‘rays’ of the star. Place a rhinestone in the middle of the star.
Sunday, December 18, 2011
Day 18: Snowflake Orb Ornament

Materials:
Assorted colorful text-weight papers, and a scrap of white cardstock
1/8 Hole Punch (and 1/16, if you have it) Fishing line or string Small Brads Snowflake stamp

Step 1:
Trim your colored papers to 1/2" wide by 5 1/2" long. You'll only need about 6-8 strips per ornament. Punch a hole through the strips at each end, about a half inch in. I like the Big Bite for this, since you can punch through all 6 strips at once!

Step 2:
Stamp a snowflake on both sides of your scrap of cardstock. Use a circle punch to trim it, or trim with scissors. Tip: put it against a window to line up the two stamps perfectly!

Step 3:
Punch a little hole though your stamped snowflake and thread a piece of fishing line though (about 8-10"). Tie the ends of the line together to make a loop (I like to put a little dab of clear nail polish on the knot to make sure it won't come undone).

Thread the loop through the hole at the other end of your strips. Make sure to thread it through the "wrong" side of the strips, so the good side of the brad faces out and the flake hangs in the center. Adjust the loop so there's enough room for the flake to hang, but not touch the bottom of the ornament.

Step 5:
Put the other brad through the top hole. This should hold the fishing line in place. Spread the strips out evenly so it forms an orb. Now it's ready to hang! The cool thing about this ornament is that you can keep the strips flat and send it in a card, or flatten them back out after the holidays and store it for next year.

Happy holidays and happy crafting!
-Portland Paper Zone
Saturday, December 17, 2011
Day 17: Photobooth Props
 This is a really easy and fun craft project for all ages. It can be a simple as print and cut, or more advanced depending on your craft skill level. Simply print out the following templates onto white or colored card-stock. Use felt, copic markers, stickles, ribbon, or any other craft items to decorate your "props." These props were printed on white card-stock, then felt was applied, and they were finished with a little edging of liquid pearls.
Templates:
Antlers
Santa Hat
Beard
Elf Hat
Mustaches
Happy holidays!
-Seattle Paper Zone
Friday, December 16, 2011
Day 16: Cupcake Cards

Step 1: Start with your cupcake template. There should the complete cupcake as well as just the cupcake top. You will want to cut this out of some festive paper. I used some of our lovely holiday 12x12s but have also had success with the so-silk paper as a solid color.


Get creative and enjoy!
-Bellingham Paper Zone
Thursday, December 15, 2011
Day 15: Winter Berry Lantern

TO CREATE YOULL NEED:
- 3 pack of Paper lanterns
- 5 sheets Text weight Curious Metallics – Jupiter
- 2.5” Uchida Circle Paper Punch
- Hot Glue Gun

1. Punch about 40 circles.

2. Expand your lantern and begin gluing one side of the cut outs around the bottom opening (make sure the side of the circle your gluing is towards the topside creating a hanging effect). Once completed there should be a single row all the way around the bottom opening of the lantern.


3. Move to the next row; glue the row of circles about a third of the way over the previous row, still creating the ‘hanging effect’. Repeat until you reach the top of the lantern. You are finished!
Have fun!
- Seattle Paper Zone
Wednesday, December 14, 2011
Day 14: Felt Treat Bags

WHAT YOU’LL NEED:
- Roll of American Crafts Rick Rack Ribbon, Pool Blue
- Packet of Basic Grey Buttons
- 3 sheets of felt: 2 Red, 1 White,
- Mitten Template & Cuff Template
1: Trace your template on both red felt pieces, also trace to cuffs on the white felt piece, and cut out - (make sure you remember that the all these peices are going to be mirrored to one another).
2: Run hot glue along the edge of the glove (except for the top opening for the treats) and place the matching glove piece on top.
3. Tack glue to each end of the cuff and bottom edges and place at the top opening of glove, keeping in mind the opening for treats.
4. Tack Ribbon across the cuff and a button at the end.
* Tip try using another holiday themed design such as a Stocking Template or Heart Template. You could also stitch your design together instead of using hot glue.
Tuesday, December 13, 2011
Day 13: Holiday Party Picks

Materials you'll need:
- Dress Template
- Cardstock/Assorted Papers
- Ruler
- Colored pens
- Scissors
- Adhesive or Paper Tape
- Dowel or plastic pick
Optional Materials:
- Shimmer Spray
- Flocking

Step 1:
Start with your template. Cut out some red cardstock in the shape of your template. I've used a lovely astro bright but there are also some great options from American Crafts.

Step 2:
Once you have the shape. Use a straight edge to create the black belt at the waist.

Step 3:
Then use a white pen (I've gone with the Uniball gel pen but there are, again, lots of options) to create the white edging on the dress. For fun I added white flocking to the dress.


Step 4:
The final touch on the dress detailing is a gold buckle (again with a Uniball gel pen).
Step 5:
The next step is adding the pick. Use shimmer spritz to color a trimmed down dowel/pick. I have tried to hold the dowel in between two of the dress forms but it never really looked right to me so I use a little bit of Hambly paper tape to hold the dowel in place.


Enjoy!
~Bellingham
Subscribe to:
Posts (Atom)