Showing posts with label invitations. Show all posts

Wednesday, June 22, 2011

Wood Veneer Paper is Here!


Move over pulp, there's a new paper in town and it's simply made out of wood! One of our newest products is wood veneer paper and the possibilities for new and exciting creations using them are endless! Below, Whitney (our wonderfully talented Tukwila Store Manager) shares some fun samples they created using this new product. I also love ideas found on Oslo Press, which has a whole range of invitation ideas using the wood paper combined with traditional letter press. I am so excited to see what all of our creative peeps make with this fun new product! --Kim

Last week we got in this fun new paper. It is real wood veneer backed with paper. You can do most of the same things with it that you can do with thick cardstock. It comes in 8 1/2x 11 sheets, 2 colors - Cherry and Birch, and 3 weights.

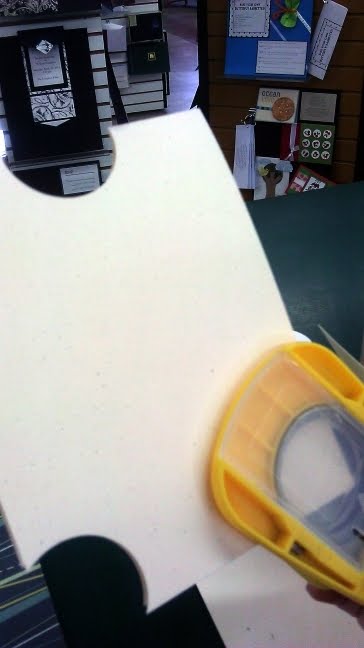
Here in Tukwila, we had to get out all of our favorite tools and try it out! First of all, we could trim it in our paper cutter just like regular paper - no power tools needed here!
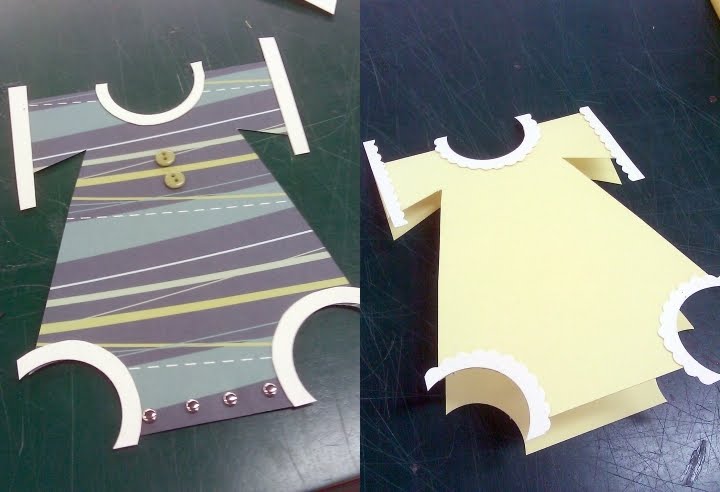
Look at all the fun things we were able to do with this paper.

Stamping:

On this sample, we stamped on the wood with Colorbox Chalk Inks. It took no time to dry and you can still see the wood grain. We had to accent it with one of our other favorite product - Liquid Pearls.


Wood Burning:

Lisa who works at our store has all sorts of hobbies, including wood burning. She brought in her wood burning tool and we tried it out. Just look at the results! She freehanded this design, but we were also able to stamp a design and follow the lines with the wood burning tool.

Embossing and Glimmer Mist:

Finally, we got out the Letterpress machine and put it to work. On this example, we were able to emboss the paper with an embossing folder and make the fancy swirl design. Then we die cut the circle shape and spritzed the finished piece with Tiger Lily Glimmer Mist. It is so shimmery in person and again you can still see the wood grain.

I am sure there are hundreds of other things you can do with wood paper - would love to see what you come up with.

Whitney, Tukwila Paper Zone

Wednesday, May 11, 2011

Onesie Invite


We were so inspired by one of the entries to the Oh Baby! Crafters Challenge that we asked Ally, the creator to do a blog post on her entry. So, guest blogging for us today is Ally from our Salem store! You can also find a link to a template Ally created for this adorable invite/announcement by clicking here.

What You'll Need:

Scissors

Scallop scissors

One 8.5 x 11 sheet of cardstock per card

Glue (I used both Liquid Tombo and the ATG gun)

Mini Glue Dots (for 3D embellishments)

1.5 inch circle punch

Step 1:

Fold your 8.5 x 11 in half (hamburger style), then cut in half for two 4.25 x 5.5 cards


Step 2:

Punch the neck hole from the middle of the scored edge on the top of the card, then punch the leg holes from the bottom corners.

Step 3:

Cut a small line about 1.5 inches from the top right edge of the card upwards toward the neck hole, stopping about .5 inch from the neck. Then cut from the edge of the leg hole on that side to the line that you just cut. This will make the sleeves and sides of the onesie. Repeat on the left side.

Step 4:

Using a rubber stamp, you can either emboss (as shown) or stamp the "You're Invited" part on the inside of the card.

Step 5:

For a onesie that is patterned, trace the card onto the back of the patterned piece, cut out, and adhere to the card.

Step 6:

For the edges at the neck, leg, and arm holes, cut out (4) 2.5 x 2.5 inch squares of corresponding paper. On two of them, punch almost an entire circle in the bottom right corner for the leg holes. For one, punch the hole in the very middle of one side for the neck. And for the last, cut two small strips for the arms. Then use either regular or scalloped scissors to cut around the punched/cut edges and adhere to the onesie. Trim edges as needed.

Step 7:

Using the Glue Dots, adhere small bows or buttons to make it even more adorable!

Thank you, Ally, for creating such an adorable project!


Don't forget to join us this Saturday from 11am - 3pm for Paper Zone's Baby Extravaganza!! We will be doing demos on how to create your own baby shower invitations, announcements, party favors and more. I hope to see you there! --Kim

Wednesday, January 19, 2011

Yellow and Gray

I have been totally obsessing over yellow and gray. Have you seen this combo lately? I have been seeing it everywhere and love it. I was so inspired I decided to make a wedding invite using these colors.(source)

Wedding invites can seem intimidating but don't be discouraged! I want to show you how simple and easy they can be using products from PZ.

To start out you'll want to find the main pieces of your invite. I stared with a piece of Hambly patterned paper, PZ Facets Slate envelopes and card stock, a 5x5 Pocket Fold Envelopment and some clear stamps from Basic Grey's new Curio collection.

I also selected some Stardream paper in the color White Gold to use for the piece with the wording as well as the Direction and RSVP cards. I used a basic word processing program on my home computer as well as my home ink jet printer for all the printing. To add a little extra interest I wanted to stamp some the the circle designs from the Basic Grey clear stamp set that went so well with my patterned paper. To get the placement of the stamps just right I placed the unmounted and clean stamps on top of my printed piece. When I had them laid out exactly where I wanted them I took my clear mounting block and placed that right on top of my stamps. With a little pressure the stamps clung on to my block and I lifted it up so I could then apply the ink.
After stamping the piece with the wording I mounted it to a piece of PZ Facets Slate card stock cut down to 5.5 x 5.5 inches. And then added a one inch strip of the pretty yellow patterned paper. Now you are ready to glue this to the Envelopment Pocket Fold card.
Next I printed and cut my RSVP and Directions cards as well as adding a half inch strip of the patterned paper. Those are tucked away neatly in the pocket with a little RSVP envelope also in PZ Facets Slate. I wanted to add a little something extra to the exterior of the card so I decided to make a seal. To do this I stamped the big circle design on a small 2 inch piece of White Gold paper. I then mounted that to a piece of slate card stock cut to 2.25 x 2.25 inches. To bring a little yellow into the seal I chose to add a pearl to the center of the design. We carry the self-sticking pearls in so many colors but the yellow we had was not an exact match with my invite. I simply colored the pearl using a Copic marker to get it the exact shade I needed! (Did you know that you can use the Copics to color rhinestones, plastic and metal too? How cool is that!?)


The finishing touch was adding the seal to the flap of the card.
Wasn't that easy? If you are thinking about creating your own invites I would encourage you to do so. They are easier than you think and you can make them to custom fit your event. (Not to mention you are going to save a lot of money!)

Happy Crafting!
Christina

Monday, January 10, 2011

Going to The Chapel...

Do you hear the wedding bells ringing? Ok, you might not hear them quite yet...but it's definitely getting to that time when brides are starting to get their fix on wedding planning. This past weekend marked my first dose of wedding for the year with our participation at the Seattle Wedding Show.


For the many years I've been with PZ, I've had a hand in putting our booth together and getting things ready for the show. Every year the show is a little different, but there are always a few things that - year after year - people just go crazy for. For one, this lingerie shower invitation.
Although a little risque, it's always been a huge hit. You can find the template for it right here, and the shopping list here. This invite has inspired lots of bridesmaids to host lingerie showers, and it's made a lot of grooms-to-be blush at our booth. And the bridesmaids always love this bachelorette party invite, so fun and girlie, a perfect invite for a girls' night out:
People also were loving these new little favor boxes, simply assemble the box, fill it with candy and you have an adorable wedding favor:

Another thing that I personally was loving this year was the cupcake booths at the show...and of course the generous samples that were handed to me as I perused the Wedding Show aisles (I think I spent the entire day yesterday fueled by cupcakes!). This year, we also showcased a really beautiful bouquet of paper flowers that people adored:

For weddings, it makes a simple and chic table centerpiece...you can even switch around the papers to match your wedding colors. The bouquet was a collaboration from a few of us at PZ, so today I'm sharing the steps to my part of the bouquet (yes...I used the tissue puff ball idea that I love - see here and here, scaled it down, and created a flower with it!).

Step 1. Gather your supplies - tissue paper, scissors and floral wire (yes, only 3 items!):

Step 2. Cut 6 sheets of tissue to 8.5" x 11" and accordian fold:

Step 3. Wrap the floral wire around the center of the folded piece:

Step 4. Cut a rounded edge from each of the ends:

Step 5. Reveal your flower by peeling away each layer of tissue, one at a time:

Check back on Wednesday to learn how to create the next flower in the bouquet!

--Lauren

Friday, December 31, 2010

Weddings for Beginners: Color Inspiration

After I recently got engaged I found myself looking down at my ring and thinking “now what?” So, I did the one thing I knew to do: I went to Paper Zone.

I have determined that aside from picking a date and place for my wedding, the next crucial step was picking colors. And who has more colors than PZ?

Knowing that we are planning an oceanside wedding, I was immediately drawn to the Aquamarine paper in the Envelopments line (below). Then there was the bronze, the pearl latte, the pearl linen, the So Silk, I could go on.

I absolutely knew I wanted handmade invitations (like the PZ sample above) because I want our wedding invitation say, “this is an important event and it is meaningful to us that you attend” and, to me, the best way of saying that is with a beautiful handmade invitation.

And thankfully, places like Paper Zone make that a doable task. In addition to numerous sample boards, we have this great checklist so you can plan all of your stationary needs at once for a cohesive presentation rather than thinking “oh yeah, I need programs too”.

There are many routes you can take with handmade invites: you can make them yourself start to finish; you can design them & then work with a professional printer; or you can work with a designer. And while we offer easy-to-follow templates and creative and helpful Associates, I opted to work with a designer (special shout out to Jennifer Witsil Creative).

My fist full of papers lead me to inspiration boards like the one to the left (I Googled "chocolate aqua wedding" and searched images) giving me ideas on other aspects of my wedding such as flowers, the cake, etc.

And, of course, out of the beautiful papers came a beautiful Save the Date:

Starting the wedding planning process can be intimidating, but start with a checklist and some inspiration and you’ll gradually move in the right direction. I really encourage any bride-to-be to stop by Paper Zone to browse. Photos cannot relay the pearl-like colors and satiny textures and papers that look like linen. . .oh it’s magical!

To see some of this magic, visit us at the Seattle Wedding Show January 8th & 9th. We’ll have some great papers and ideas on display (maybe even my invites too!). I hope to see you there. --Kim