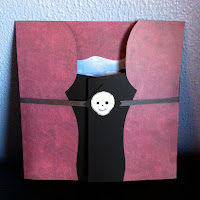
Hi Everyone
Keeping with the spirit of Halloween, I tried my hand at creating two origami cats. The first is simple and the second is intermediate. Of course being who I am, I immediately wanted to jump into the advanced cat, but it was just a bit too frustrating, especially given the fact that I have done very little origami in my life.
I did find it to be a fun project and am looking forward to becoming more proficient and making some great paper art. I have a sneaking suspicion this is just the beginning for me.
Simple Origami Cat
Step 1: Start with a black
piece of origami paper or a very thin
equivalent.

Step 2: Fold down the top half of the paper and crease.
Step 3: Fold the paper in half once more so it is fourth of the original piece. Re-open the last fold.
Step 4: Using the middle line as a guide, fold over the two opposite corners to create the ears of the cat.
Step 5: Hold down and crease the top
triangle to create a flat top of the head.

Step 6: Flip the cat over.
Step 7
: Embellish your cat face with eyes, a nose and whiskers. I used
googlie eyes, a small
piece of pink ribbon for the nose, and thin paper strips for the whiskers.
Intermediate Cat
This cat is more complicated, so I have also included a video showing you how to fold the piece. Since I am new to origami, I am not sure yet of all of the technical folding terms, so this video also helped me out a lot.

Step 1: Start with a square piece of origami paper.

Step 2: Fold the paper in half.
Step 3: Unfold the paper and refold in the other direction.
Step 4: Open up your square and fold in two opposite corners to where they meet at the mid line.
Step 5: Fold over at the mid line
Step 6: Taking one corner, fold over, using both top corner angles as a guide. The top right hand corner should create an angle that is shy of 90 degrees. Line up the right corner with the left corner to create a line running corner to corner. This is important as this fold creates the body of the cat.
Step 7: Fold the bottom half of the body over the corner fold at the fold line. This creates a tail.
Step 8: Unfold to step 5. Holding the tail portion, open up the other fold to look like the following picture.
Step 9: Push down on the side corners to create a face and crease.
Step 10: Using the body as a guide, fold in one of the triangles at the side of the face.
Step 11: Fold the tip of that triangle out to create the ear.
Step 12: Flip the body over to the other side .

Step 13: repeat steps 10 and 11 to create the second ear.

Step 14: Your project should resemble this.

Step 15: Fold
down the top point of the head to create a flat top for the head.

Step 16: Crease and tuck in the top fold. It will fit
under one of the ears.

Step 17: Flip the cat over and fold the bottom triangle (nose) up.

Step 18: Fold the top of the triangle down to complete the nose.

Step 19: Using the bottom of the cat as a guide, fold the tail in.

Step 20: Unfold this last fold and refold it inside the cat.

Step 21: Take the tip of the tail and fold it back half ways and crease.

Step 22: Now the tail sticks out from the body just a little bit.

Step 23:
Decorate the cat face with eyes and whiskers.
If you enjoy these projects, join us at the Paper Zone in Portland, OR for an Origami Class.
The class will be held on October 24th (12pm to 2pm). Ramsay Cowlishaw will be teaching some fun Halloween themed origami projects (pumpkins, bats, and scary masks!)
The class will cost $20, and all materials will be provided.
Happy Crafting, Sandra
 Measuring 4"x6" these calendars will fit nicely in a purse and as they are covered in the beautiful and timeless artwork that Cavallini is known for, are sure to stand out amongst the lipsticks, cellphones, sandwiches (Annie Hall lovers take note) or anything else you may carry with you. They also feature week-at-a-glance layout, sections for addresses and notes, and each calendar has Paris, London and New York City transit maps. How cool is all that! These calendars make the perfect gift for yourself and others, of course :).


 Step 13: repeat steps 10 and 11 to create the second ear.


 Step 22: Now the tail sticks out from the body just a little bit.