


Hi Everyone
I have been having a difficult time lately organizing my time. There just doesn't feel like there is ever enough time to get everything done. I am sure I am not the only one who feels this way. Obligations definitely seem to have a way of taking us over and running us down.
A very good friend of mine suggested I make a chart to organize my time to include all the things I want to do just for me. It is amazing how sometimes you just need someone to push you in the direction you know you should already be heading. I decided that this was a great idea and set out to make myself an organizer.
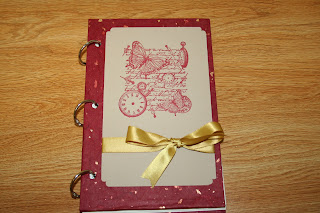
I have used this method to make journals that I like to give as gifts. I usually bind the journals I make with ribbon, but decided that if I used book rings instead, I would be able to remove and add more pages as I needed.
Ingredients for this project
Two 5.5x8.5 pieces of cardboard, bookboard, or mounting board
Two 12x8 pieces of decorative paper. (I like using handmade paper)
Two 4.5x7.5 pieces of cardstock
Crop-a-dile or hole punch
25-50 pieces of 8.5x11 sheets of text weight paper.
(I like Classic Crest Classic Natural White the best)
3 small book rings
Embellishments of your choice
Adhesive
Step 1
Cover your pieces of cardboard in the decorative paper as if you are wrapping a gift. Secure with adhesive.


Step 2
Cover the underside of the cardboard with the pieces of cardstock. Secure with adhesive. These are the front and back covers of your organizer
Hole punch the sides of each cover piece, paying attention that they are lined up identically.

Step 3
Embellish one cover as desired.

Step 4

Step 4
Print out the pages of your organizerj. You can use this tempalte. Using a paper cutter, cut these to size and hole punch them. Pay attention to make sure they line up with the front and back cover of your organizer.

Step 5
Using book rings, bind the organizer together.

Happy Crafting
Sandra

Step 5
Using book rings, bind the organizer together.


Happy Crafting
Sandra
No comments:
Post a Comment