

Hi Everyone
May and June for me are definite card making months. There is my father's birthday, husband's birthday, my daughter's birthday, my son's birthday, and Father's day. I had come across this card design in the past, but have never attempted to make it, thinking it would be a good card to make during this time. I decided to make it for my daughter's birthday.
Ingredients for this card:
Scoring tool
4.5 x 9 inch piece of cardstock for the base of the card
4.25x4.25 piece of cardstock in a coordinating color
4.25x4.25 piece of double sided cardstock
Dimensional adhesive
2x2 inch piece of cardstock
Regular adhesive
Assorted stamps and embellishments
Step One
Place your 4.25x4,25 piece of double sided cardstock on your scoring tool diagonally. The points will line up at the 3 inch marks. Score at the 1 inch and 1.5 inch groves. Turn cardstock to score each corner.

Your scored piece of cardstock will look like this

Step Two
Fold the 1.5 inch score lines in and the 1 inch score lines back. Your cardstock now makes a small frame.

Step Three
Score your 4.5x9 piece of cardstock at the 4.5 inches. This is your card base

Round the corners of your 4.24x4.25 piece of cardstock.

Step Four
Stamp a message or embellish the 2x2 piece of cardstock for the center of the frame.

Step Five

Step Five
Adhere the 2x2 piece of cardstock to the frame with adhesive. Place dimensional adhesives on the inner side of the frame in the .5 inch scored space. Adhere together.

Step Six

Step Six
Place dimensional adhesives on the center edges of the four sides.
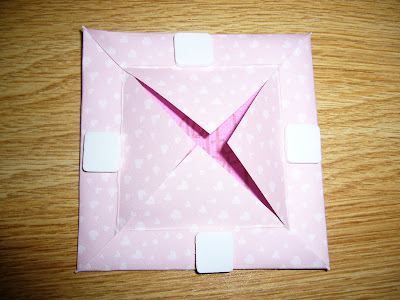

Fold back and adhere. You now have your frame.


Using adhesive attach the frame to the front of the card.


Step Seven
Using adhesive, attach the 4.25x4.25 piece of cardstock to the card base.

Using adhesive attach the frame to the front of the card.

Step Eight
Embellish as desired.

Happy Crafting
Sandra
What a brilliant post, really love this!
ReplyDeleteGreat read thankk you
ReplyDelete