This is a basic concept for a card that can be modified for any paper and edge punch. I choose to use a black/white pinstripe paper, a complimentary paper, and a white lace edge.

Step 1 - from a 5x7 card, trim 1/4" off the back side of the card.

Step 2 - Using your choice of edge punch, punch along the front side of the card. In addition, cut 2 more 8" strips of 'lace' from your edge punch.

Step 3 - Cut a 4-1/4"x7 strip of decorative paper and adhere to the card.

Step 4 - Attched one of the strips of lace trim, slightly above the first edge on the card and slightly offset. The final strip of lace trim should be attached to the edge of the decorative paper and again; slightly offset.

Step 5 - Trim the edges and attach a row of 'bling' between the edge of the decorative paper and the lace trim.

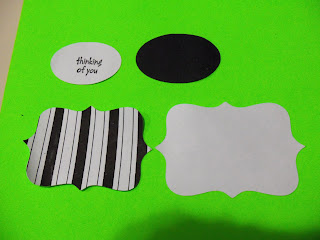
Step 6 - Cut out a decorative frame, using a complimentary paper to your card along with a contrasting 'shadow'. In additon, cut out an oval with a contrasting shadow. Stamp the oval with your greeting of choice

Step 7 - Adhere the decorative frame to it's 'shadow' and the oval to it's 'shadow'.

Step 8 - Attach the oval shapes to the decorative frames

Step 9 - Attach the frame & oval set to the card. Slightly lift the lace edges to give more dimension to the card. Enjoy!

Be creative with your papers, edges, bling and greetings. It can be used all year long and is very 'girly'.
Debbie McGowan

I'm a DISASTER with paper art, but this is soooo beautiful & you explained it so well, MAYBE even I can make one without messing it up! THANK YOU!!!
ReplyDelete