Friday, October 28, 2011

Kristy's Eerie Halloween Card

Supplies you'll need:

Black card stock (any size)
Standard cover stock for templates
Colorbox White stamp pad
Cosmetic sponge (leftover from Halloween last year!)
White Jellyroll pen
Pow Glitter Paper
Marvey Circle punch
Double-sided adhesive (we love the pink ribbon ATG gun)
Small witch-on-broomstick, bat, or other flying image (think Santa for the upcoming holidays!)

** By request we have uploaded a PDF printable "C ityScape" template! **

1. From scrap stock, cut cloud template (a bit wider than your card) and cityscape template.

2. Position cityscape at bottom of card.

3. Position cloud template near the top of the card. Ink up cosmetic sponge on ink pad, and gently dab onto card, overlapping dabs to create first layer of clouds.

4. Move cloud template down a little and shift its position to one side or the other, and repeat dabbing.

5. Continue creating cloud layers, shifting template, turning template over, to create random cloud puffs, all the way down to the cityscape. Dab well between the buildings.

6. Remove cityscape template and gently dab along very bottom of card to create "fog".

7. Use white Jellyroll pen to dot lit windows.

8. Punch out moon, adhere with double-stick adhesive.

9. Position witch/bat image over moon & you are done!


Thanks to Kristy at the Seattle store for creating this great Halloween card design.

Have fun PZ'ers making this super cute Halloween Card!


- Seattle Paper Zone

Thursday, October 27, 2011

Sparkly Spider Treat Box

Here is a quick and adorable project for those special trick-or-treaters, or perhaps a party favor for your Holidays guests.

First, let’s make sure we have all our supplies:

Trimmer

12x12 Patterned cardstock

Glitter Paper

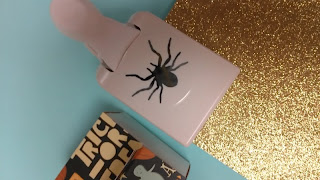
Martha Stewart spider punch

Jute, twine or ribbon

Adhesive/Glue

3x2 box

Next, we are going to take your 12x12 patterned cardstock and cut it to 3”x12” .


You are now going to take that strip and score it at 1”, 2.5”, 4.5”, 7.5”, 9.5” and at 11”.

This will allow it to wrap beautifully around your 3x2 box full of goodies.

Add your favorite adhesive to the 1” end, wrap around your box and adhere.

Now we are going to punch out a couple of spiders, using the Martha Stewart punch.

Take two of these spiders and put them back to back so you can see it nicely from both sides.

Adhere the “bottoms” and back legs together, leaving the head and front legs not adhered. This will allow you to now put the spider over the corner of your box topper.

We are almost done! Wasn’t this easy?!

Now tie some jute, twine or ribbon around the boxes topper.

Add a tag and WALLAH!


You are done!

Leave us a comment and let us know how your project turned out!! We’d love to hear about it!

XO,

Shoreline Paper Zone

Wednesday, October 26, 2011

Happy Halloween!

It's that time of year again for yummy Halloween treats! What better way to give your treats than in festive handmade packaging! This is a simple and easy way to present a gift. For this project you will need the following items:


Tag punch, Happy Halloween stamp, cello treat bags, 1/4" hole punch, black and orange rhinestones, black ribbon, black ink pad, and orange cardstock.


First, start by punching out your tag shape from the orange cardstock. Then, punch a ribbon hole at the top of the tag.


Next, stamp 'Happy Halloween' diagonally on the tag. I also inked around the edges of the tag to give a distressed look.


Now it's time to embellish! Place a few of the orange and black rhinestones in the bottom right corner of your tag in a cluster.


Now, place your treats inside one of your cello bags. I used homemade white chocolate and coconut cookies, but you could use Halloween candy, a candied apple, or anything else festive! Then using the black American Crafts sheer ribbon, tie the tag around the top of your treat bag.


....and voila! Your festive Halloween treat gift is finished!


Happy Halloween and Happy Crafting!


-Malyse

Friday, October 21, 2011

Fall Fanned Out Faces

Today I am sharing with you all another great Fall decoration idea brought to you by our crafty team in Seattle: Fall Fanned Out Faces!


We found this one in the October issue of Martha Stewart Magazine! Check out her new Halloween and Holiday Craft lines at any of our Paper Zone Locations!

What you’ll need:
- Three 8.5x11 sheets of text weight paper (Black : OWL, Orange: PUMPKIN)
- Double stick tape
- Scissors
- Oval hand punch
- Floral wire or Pipe cleaner
- A sheet of orange, yellow, and black –OWL Only
- A sheet of green –PUMPKIN Only
1: Score your three sheets of 8.5x11 paper; scoring the 11” side from top to bottom.

2:Use your double stick tape to attach all three pieces.

3: Secure middle with floral wire or pipe cleaner.
4: Again use your double stick tape to close the remaining open spots.

5: For Brow and Eye; Download the available PDF for the Owl’s Brow and eye and print. Trace the cut out shapes on your black and yellow paper.

6: For beak; Fold your orange 8.5x11 in half, using the top corner cut a 90 degree triangle off the top. Keeping your paper folded, draw the shape of beak you would like and cut. Open beak and punch two nostrils.

7: Double stick tape Brow, Eyes and Break on your Fanned Out Face.
8: Hole punch the top of your Fanned out face and hang.


Happy Fall Crafting!


Christina

Wednesday, October 19, 2011

Pumpkin Lanterns


I am happy to share with you a project brought to you by our talented staff in Seattle. They have created the most amazing Halloween decoration including today's project: Pumpkin Lanterns! Below are instructions on how to make your own
What you’ll need:
-Paper Lantern
-Pipe Cleaners
-One sheet of green paper
-Glimmer Mist - Tiger Lily and/or Sun Flower
-Color Box Chalk Ink Pad – Tangerine
-Green Floral Tape


1: Spray your lantern with Glimmer Mist, and let dry for ten minutes.


2: Rub your ColorBox Chalk ink pad from top to bottom all the way around. Let dry for ten minutes.


3: Fold your 8.5x11 in half. Draw a half heart shape facing the fold. In the middle of the half heart draw the tail end of a crescent moon and begin to cut your leaf.

4: For curly tendrils, spiral two brown pipe cleaners around a marker, then slide off.

5: For leaf and stem; Attach leaf and tendrils to the paper lantern by winding the ends of the pipe cleaners around the wire frame. For stem, roll a few sheets of newspaper into a tapered shape; cut off wider end, then wrap other end with green floral tape. Wrap another brown pipe cleaner around base of stem; secure ends to wire frame.

6:Hang lanterns with fishing line.


Thanks, Seattle Team, for sharing your creative ideas with us!


Christina


P.S. Stay tuned: Next up will be instructions on how to make the cute fan faces as seen in the first photo!

Friday, October 14, 2011

Boo Card


It is almost Halloween. Time for costumes, cider, and candy. All those fun fall things: Pumpkins, apples, and scarecrows. I saw this super cute card and had to make it. This is definitely one of my favorites I have made in a while.

Ingredients for this Card

Black Cardstock - 5.5x4.25
White Cardstock -4.25x11
Cardstock - 8.5x5.5 scored at 4.25 for the card base.
Black Stamp Pad
Deckle scissors
Googlie Eyes
Boo stamp or Alphabet letters Stamp
Paper Trimmer
Adhesives

Step One

Using your deckle scissors, cut the white piece of cardstock across at different angles. Cut another notch out of one of the pieces for the googlie eyes. Using your stamp pad, ink around the edges of the white paper. Don't worry if you get any extra ink on the paper.


Step Two

Layer the inked paper strips on top of the black 5.5x4.25 piece of cardstock. Making sure you leave the notch for the googlie eyes.


Step Three

Using a paper trimmer. Trim the edges so your piece is around 4x5.25.


Step Four

Attach googlie eyes and stamp "Boo" under the eyes. If you don't have a Boo stamp, using alphabet letters would work great.


Step Five

Attach this piece to your base card. I thought it looked best on black. Then you can use a white pen to write your message on the card.


Happy Crafting

Sandra