
 Step 1
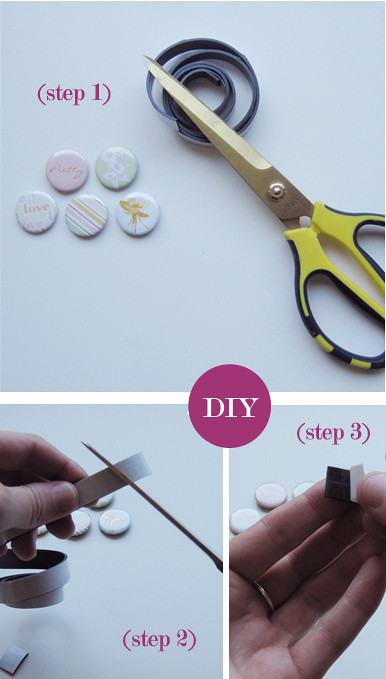
Find your magnet to be! I bought these pre made button like stickers, and just pealed off the small piece of adhesive that came on the back.
Step 2
Rolls of magnet tape are pretty inexpensive, and although not super strong, work well for light weight pieces. Cut a small strip for the back of your magnet to be.
Step 3
Peel the backing off the magnet piece and adhere to the back of your new magnet!
Rolls of magnet tape are pretty inexpensive, and although not super strong, work well for light weight pieces. Cut a small strip for the back of your magnet to be.
Step 3
Peel the backing off the magnet piece and adhere to the back of your new magnet!
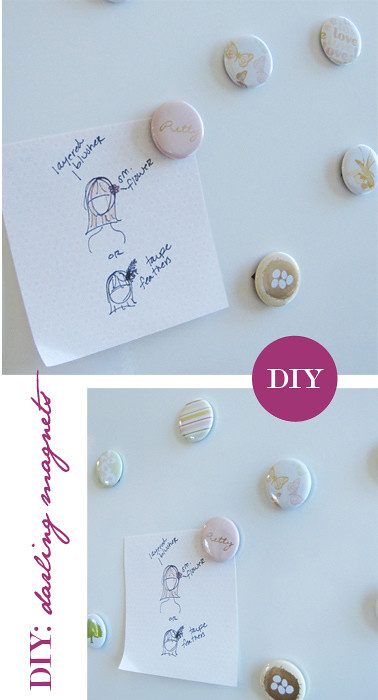
Working in the Portland store I am surrounded by many talented customers who keep my inspiration on its toes. When we received these sweet little stickers I felt a DIY project in my fingertips. The button like stickers we just received as a part of the newest line from American Crafts called "I Do". I fell in love with the whimsey feel of each one and then I remembered I have two clean white magnet boards at home in need of new magnets. For under $5 this small project was very pleasing to make happen! Other great materials that can be turned into magnets are old buttons, chipboard cut outs, or maybe a laminated photo you adore. Think outside the box a little! For more daily ideas read along my personal
blog: bee keeper studios.
blog: bee keeper studios.
Happy crafting!
Andrea
Andrea
No comments:
Post a Comment