


You will need a few products to make your shrink plastic embellishment. You need shrink plastic, a sanding block, stazon ink, a large rubber stamp and a heat tool. We also used copic markers and a crop-a-dile.
Step 1: Sand one side of the shrink plastic. This gives some texture for the ink to stick. If your image is smaller, you may not need to sand.
 Step 2: Ink up your stamp with Stazon Ink - this ink dries on plastic, glass and metal! We left our stamp face up and pressed evenly on the shrink plastic so we could see we got a good impression of our image.

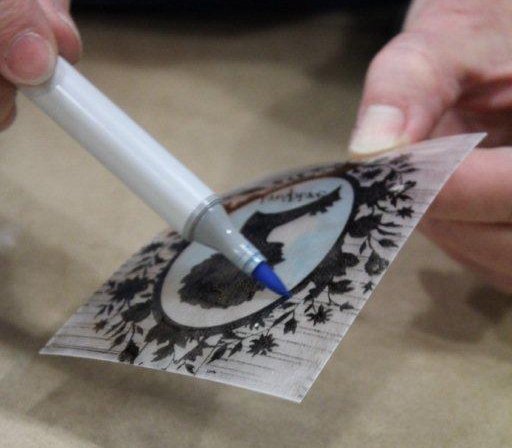
Step 3: If you want to add some color to your shrink art, turn your image over and color with copic markers on the opposite side of where you stamped. Copic markers also work on plastic, glass and metal. You can also color with sharpies and colored pencils. If you choose colored pencils, you will want to sand both sides of your shrink plastic.
Step 4: If you want a hole in your finished piece you need to punch it before you heat the Shrink Plastic. You want your hole to be much bigger than it needs to be, because it will get smaller when you shrink it. We used the large size hole on the crop-a-dile.

Step 5: It is time to heat using your embossing gun. Don’t be scared! It works well to put something in the hole of the embellishment so it doesn’t blow around while you are heating it. If you don’t make a hole, you can put your piece in a small metal cookie tray for the same reason. Start heating - your piece will begin to shrink and curl up. Don’t Stop! Continue to heat until the piece stops shrinking and flattens out.


Step 6: As soon as you stop heating, we like to flatten it out with an acrylic block or the back of a large stamp. Wait for your piece to cool and you are done.

Shrink plastic is so much fun! There are so many things you can do with it - die cutting, abstract art or put to use all the larger stamps you may have in your collection. We also liked how the large flower stamp shrunk down and we turned it into a necklace.

You can even print patterns on the sheets with an inkjet printer to come up with some really pretty designs - simply print on the shrink plastic, cut to the shape you want, punch a hole and then shrink them down! Check out these charms from craftstylish:
 And look at how cool these charms turned out with photos printed on them, a truly personal, homemade gift for a friend, or a GREAT Mother's Day gift! Enjoy!

--Whitney, Tukwila Paperzone
my daughter and I love shrink film! I like using it for jewelry, bookmarks, and in my scrapbook ^_^
ReplyDeleteI always color on one side though, so its easy to 'seal' it after it shrinks.
For a really cute personal cameo, trace a pic of your child's profile inside a frame stamp!
I love the idea of tracing a child's profile for that extra special personal touch. Thanks for sharing with all of us!
ReplyDeleteWhitney, this is SO COOL! I love that you have tips that the hardcore crafters had to learn the hard way. This is just oh-so-classy!
ReplyDeleteThis is AWESOME!!! I can't wait to try this out! Very cool - thank you for the tutorial!
ReplyDeletea great tutorial :)
ReplyDeleteI'll try this one for sure.
Thanks for sharing ♥
Wow really nice charms, I'm going to have to make some of these this weekend!
ReplyDeleteI love how versatile shrink plastic is for creating unique embellishments.
ReplyDelete