Friday, May 20, 2011

Frame Card


Hi Everyone

May and June for me are definite card making months. There is my father's birthday, husband's birthday, my daughter's birthday, my son's birthday, and Father's day. I had come across this card design in the past, but have never attempted to make it, thinking it would be a good card to make during this time. I decided to make it for my daughter's birthday.


Ingredients for this card:

Scoring tool
4.5 x 9 inch piece of cardstock for the base of the card
4.25x4.25 piece of cardstock in a coordinating color
4.25x4.25 piece of double sided cardstock
Dimensional adhesive
2x2 inch piece of cardstock
Regular adhesive
Assorted stamps and embellishments


Step One

Place your 4.25x4,25 piece of double sided cardstock on your scoring tool diagonally. The points will line up at the 3 inch marks. Score at the 1 inch and 1.5 inch groves. Turn cardstock to score each corner.


Your scored piece of cardstock will look like this


Step Two


Fold the 1.5 inch score lines in and the 1 inch score lines back. Your cardstock now makes a small frame.


Step Three

Score your 4.5x9 piece of cardstock at the 4.5 inches. This is your card base


Round the corners of your 4.24x4.25 piece of cardstock.


Step Four


Stamp a message or embellish the 2x2 piece of cardstock for the center of the frame.


Step Five


Adhere the 2x2 piece of cardstock to the frame with adhesive. Place dimensional adhesives on the inner side of the frame in the .5 inch scored space. Adhere together.


Step Six


Place dimensional adhesives on the center edges of the four sides.
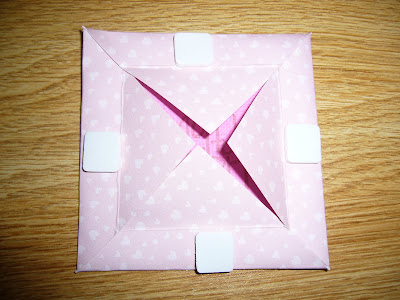


Fold back and adhere. You now have your frame.


Step Seven


Using adhesive, attach the 4.25x4.25 piece of cardstock to the card base.


Using adhesive attach the frame to the front of the card.


Step Eight


Embellish as desired.


Happy Crafting


Sandra

Wednesday, May 18, 2011

New Hambly Washi Tape

Hi Everyone! I am so excited to show you the newest product in our stores, washi tape by Hambly!
This product is really versatile, it can be used as an embellishment on cards and scrapbook pages as well as an alternative to traditional gift wrap ribbon. The tape is made from paper and is pretty strong while also being thin and transparent. It is also re-positional on most serfaces!

The first thing I created with this fun tape was a card.
I started by gathering my supplies including white card stock, washi tape, a few stamps, some black ink, a paper trimmer and scoring board.After cutting the card stock down to 8.5 x 5.5 score the paper to create an A2 card measuring 4.25 x 5.5. Then take the washi tape and tear different length pieces. Place tape onto card randomly, laying some on horizontally and some vertically. Then simply stamp desired image over tape.

Here is another card I made using the same technique with a different stamp image: I also used the washi tape with the new banner rub-ons (also from Hambly) to create a scrapbook page.
To get a different look with the tape I pleated the tape as I placed it on the paper.

This gave me a feminine, ruffled look I was going for.
Next I applied some rub-ons to the top of my page. I like to cut the images out of the rub-on sheet before applying it to my project just to make sure I don't accidentally apply more designs.
With a few photos and some letter stickers for a title, my page is complete! How easy was that?And because I couldn't get enough of the tape, I had to make one more card! On this card I applied a rub-on onto a small piece of washi tape.
Really, this is my favorite product in our stores right now. You can do so much with it! Look at what Molley in Bellevue made:She used the tape to decorate small gift boxes as well as creating the cutest little pennant banner!

Hurry into Paper Zone and buy this tape, I have a feeling it is going to sell fast!

Happy Crafting,
Christina

Monday, May 16, 2011

Paper Marbling


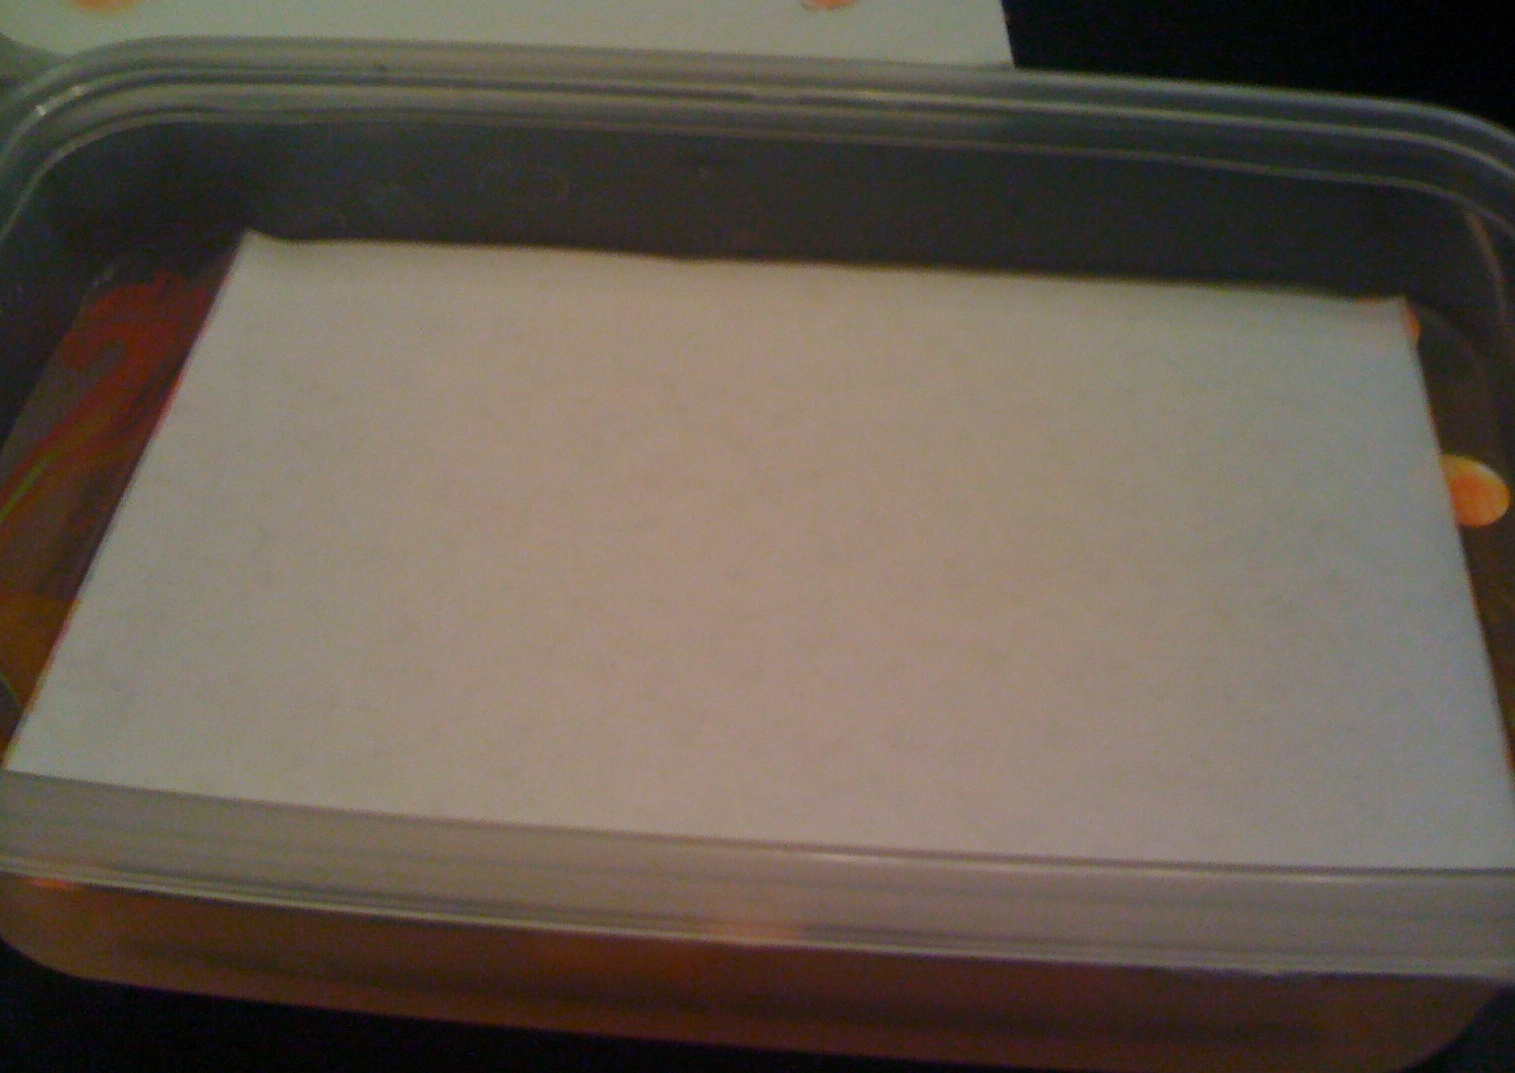
The art of paper marbling dates back centuries in all parts of the world. You have probably seen many of these beautiful papers at fine stationery stores or used as covers on hardbound books. I have always been fascinated by these and it wasn't until recently that I discovered it is really a very simple process. Basically all it entails is floating color (ink or paint) on water, then transferring it to an absorbent paper surface.

I tried my hand at this ancient technique using a Japanese Suminagashi Marbling Kit and regular copy paper.


First you need a dish filled with water (about 1-2" deep) that is large enough that you will be able to lay your sheet flat on the surface of the paper. This kit includes "float papers" (pictured above) which are basically just 1/2" circles of paper that have are slightly heavy in weight (maybe close to an 80# text). Completely submerge these float papers into your water and let them float back up to the surface.


You will then drop one drop of your paint onto the center of the float paper. The paint should immediately spread across the surface of the water. Make sure not to touch your ink directly to the surface of the water but rather let it drop onto the water over the float paper. This prevents the ink from sinking to the bottom of your tray.


Add additional drops of ink in your choice of alternating colors until you feel you have enough ink floating on the surface of your water.


At this point, you can manipulate the ink and create the marbled effect. I did this by slowly running the sharp end of a stick through the ink to create a random effect. you can also try gently blowing on the surface of the water to move the ink around. Really the possibilities are endless, but it is important not to stir up the ink too much as you can muddy the colors and lessen the distinctive marbled effect.


Once you are satisfied with your pattern, just lay your paper on the surface of the water. You do not need to leave it there very long, maybe just a couple of seconds.


Carefully remove it from the water and place it ink side up on some paper towels or newspapers to let it thoroughly dry.


Even I, a true beginner in the art of paper marbling, was able to create these really fun and totally distinctive patterns in just a few minutes. Here is another color scheme I tried that I thought turned out really nice:


This technique is a lot of fun and though I am only just getting the hang of it, I think I was able to get some really interesting results. I can't wait to try some more advanced designs! -Amanda


And on another note...

Congratulations to Ally from Salem PZ for winning our Oh Baby! Crafter's Challenge!

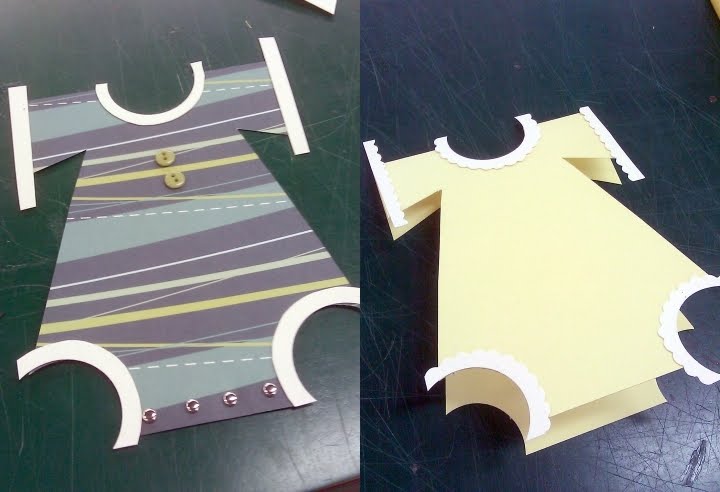
Ally created a little onesie invite featured last week on our blog. It's so cute and a really creative way to use all of our secret ingredients. Nice Job Ally!

We are still accepting submissions from our customers through May 27th, so if you have a great idea for a fun baby project, check out the details and get your entries in soon! We always love to see all of your great creations!

Friday, May 13, 2011

Little Paper Party Favors


Our stores are brimming with cuteness right now! You'll witness all this bouncing baby joy if you come to our Baby Extravaganza tomorrow - from sweet baby announcements to shower invitations, cute cupcake pinwheels and homemade baby nursery decorations - we have it all when it comes to adorable baby inspiration! One of the things that not many people think of when hosting a baby shower is: party favors. We came up with one that is so easy to create and you can fill it with whatever you want ~ candy is the most obvious choice, but you could also put jewelry in there, make it a "baby fortune cookie" by putting a little fortune inside...maybe even a fortune that reveals the sex of the baby! Ready to learn how to make these? You'll be a party favor-making pro in just FIVE Easy Steps!

Step 1) Cut paper to 6" x 3"
{You can make it larger or smaller than this, but this is a good size to start with}


Step 2)
Flip the paper over and put adhesive on 3 of the sides
{I marked the sides that I put adhesive on just to show you where to put it, you don't need to do this}

Step 3) Roll it up!
{Just roll it together from the short edge to the other short edge, very easy!}

Step 5: Pinch one edge together, fill with candy/goodies, and then pinch it closed
{You want to pinch each side in opposite directions so it forms a triangular shape}

Wasn't that easy? Super simple and oh-so-cute! Now decorate with glitter, punches, ribbon, whatever you want to personalize your favors or make them match your party theme. These are also great for birthday parties, bridal showers and make great, inexpensive wedding favors too! I hope to see everyone at the Baby Extravaganza tomorrow from 11am to 3pm, we will be demoing these adorable favors as well as some amazing Baby Shower Invites done 3 Ways and will have refreshments! --Lauren

Wednesday, May 11, 2011

Onesie Invite


We were so inspired by one of the entries to the Oh Baby! Crafters Challenge that we asked Ally, the creator to do a blog post on her entry. So, guest blogging for us today is Ally from our Salem store! You can also find a link to a template Ally created for this adorable invite/announcement by clicking here.

What You'll Need:

Scissors

Scallop scissors

One 8.5 x 11 sheet of cardstock per card

Glue (I used both Liquid Tombo and the ATG gun)

Mini Glue Dots (for 3D embellishments)

1.5 inch circle punch

Step 1:

Fold your 8.5 x 11 in half (hamburger style), then cut in half for two 4.25 x 5.5 cards


Step 2:

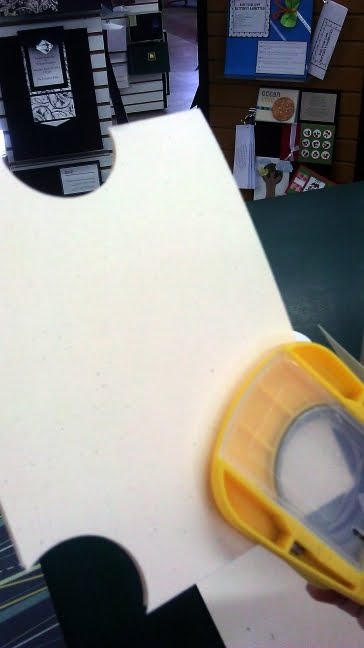
Punch the neck hole from the middle of the scored edge on the top of the card, then punch the leg holes from the bottom corners.

Step 3:

Cut a small line about 1.5 inches from the top right edge of the card upwards toward the neck hole, stopping about .5 inch from the neck. Then cut from the edge of the leg hole on that side to the line that you just cut. This will make the sleeves and sides of the onesie. Repeat on the left side.

Step 4:

Using a rubber stamp, you can either emboss (as shown) or stamp the "You're Invited" part on the inside of the card.

Step 5:

For a onesie that is patterned, trace the card onto the back of the patterned piece, cut out, and adhere to the card.

Step 6:

For the edges at the neck, leg, and arm holes, cut out (4) 2.5 x 2.5 inch squares of corresponding paper. On two of them, punch almost an entire circle in the bottom right corner for the leg holes. For one, punch the hole in the very middle of one side for the neck. And for the last, cut two small strips for the arms. Then use either regular or scalloped scissors to cut around the punched/cut edges and adhere to the onesie. Trim edges as needed.

Step 7:

Using the Glue Dots, adhere small bows or buttons to make it even more adorable!

Thank you, Ally, for creating such an adorable project!


Don't forget to join us this Saturday from 11am - 3pm for Paper Zone's Baby Extravaganza!! We will be doing demos on how to create your own baby shower invitations, announcements, party favors and more. I hope to see you there! --Kim